
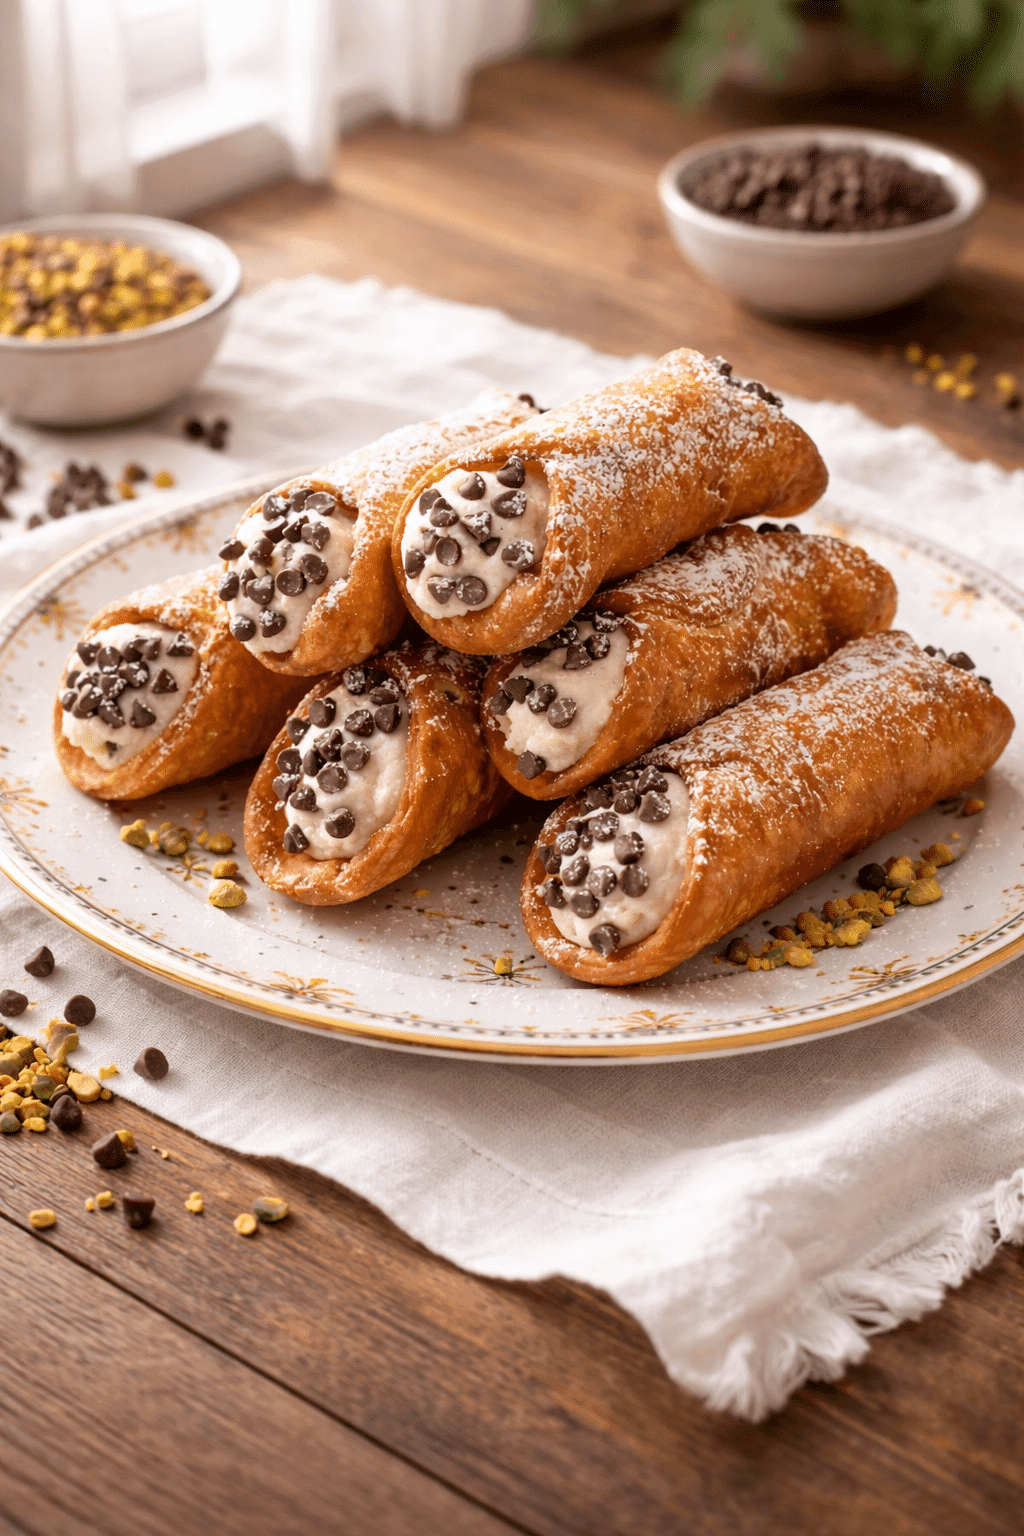
Homemade Cannoli have always felt like a celebration dessert in my kitchen. The first time I tested Homemade Cannoli at home, I worried about frying the shells, but once I heard that gentle sizzle and saw those golden bubbles form, I knew it was worth it. The shells turn perfectly crisp and flaky, while the filling stays smooth, lightly sweet, and creamy with tiny pops of chocolate. I usually make Homemade Cannoli when we host family dinners or during the holidays because they look impressive but feel comforting. Daniel loves extra chocolate chips on the ends, and my girls always ask to help pipe the filling. They’re crisp on the outside, velvety inside, and surprisingly doable at home.
You’ll love this Homemade Cannoli recipe because it delivers crisp, golden shells and a creamy ricotta filling that tastes fresh and balanced. You’ll appreciate how the dough comes together easily and fries into beautifully blistered pastry. You’ll also enjoy that you can prepare the filling ahead of time, then pipe it in just before serving. Most of all, you’ll love how bakery-style Homemade Cannoli feel special yet completely achievable in your own kitchen.
Table of Contents
Key Ingredients & Seasoning Options
Let’s talk about what makes Homemade Cannoli truly special. Each ingredient plays an important role, so as you gather everything, you’ll understand exactly why it matters.
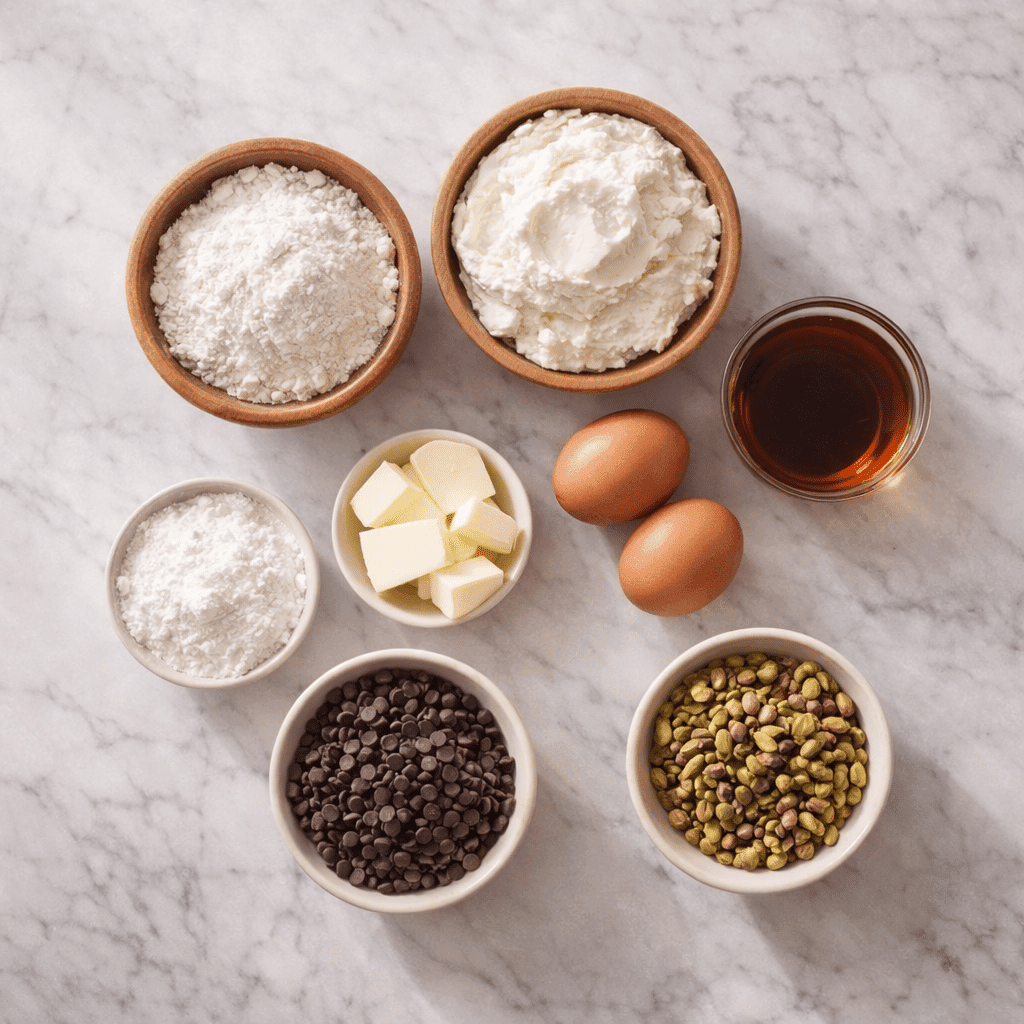
All-Purpose Flour
This builds the structure of your shells. It gives you that sturdy, crisp bite that holds the creamy filling without turning soggy.
Granulated Sugar
Sugar lightly sweetens the dough and helps the shells turn beautifully golden when you fry them.
Salt
Even in dessert, salt matters. It balances sweetness and keeps the shells from tasting flat.
Unsalted Butter
Cold butter creates subtle richness and helps form those delicate bubbles in the shell as it fries.
Marsala Wine
Marsala gives Homemade Cannoli their signature flavor. It adds depth and helps create those crisp, blistered shells. If the dough feels dry, add wine slowly—just enough to bring it together.
Egg Yolks
Egg yolks enrich the dough and make it tender while helping everything bind smoothly.
Egg Whites
You’ll brush these on the edges to seal the shells before frying. Think of it as edible glue that keeps them from opening in hot oil.
Vegetable Oil
Choose a neutral oil with a high smoke point. Properly heated oil creates that light, crunchy texture instead of greasy shells.
Whole Milk Ricotta
This is the heart of the filling. Always drain it well so your filling stays thick and creamy instead of watery.
Powdered Sugar
Powdered sugar blends smoothly into the ricotta and keeps the filling silky without any graininess.
Mini Chocolate Chips
These add tiny bursts of chocolate in every bite. Press a few extra on the ends for that classic bakery look.
Vanilla Extract
Vanilla softens the tang of ricotta and rounds out the sweetness beautifully.
Cinnamon
Just a touch adds warmth and subtle spice. It shouldn’t overpower—just whisper in the background.
Finely Chopped Pistachios (Optional Garnish)
Pistachios add color, crunch, and a slightly savory contrast that makes each cannoli feel extra special.
When you understand how each ingredient works, making Homemade Cannoli feels less intimidating and much more fun. You’re not just following steps—you’re building flavor and texture with intention.
Why do my cannoli shells turn soft after filling?
Homemade Cannoli shells soften when moisture from the ricotta filling seeps into them. To prevent this, always drain your ricotta thoroughly and chill the filling until thick. Then, fill the shells just before serving—ideally within 1–2 hours. If you need to prep ahead, store the shells in an airtight container at room temperature and keep the filling refrigerated separately. That way, you’ll keep that crisp, golden crunch everyone loves.
Pro Tips for Success
- Drain the ricotta thoroughly. Extra moisture leads to runny filling and soggy shells, so take the time to squeeze out as much liquid as possible.
- Rest the dough properly. That full hour allows the gluten to relax, which makes rolling easier and prevents shrinkage.
- Roll the dough thin. Aim for about ⅛-inch thickness so the shells fry up light and crisp instead of thick and bready.
- Seal the edges firmly. Brush enough egg white on the overlap and press well so the shells don’t pop open in the oil.
- Monitor oil temperature closely. Keep it around 360°F. If the oil runs too cool, shells absorb oil. If too hot, they brown too quickly.
- Fry in small batches. Overcrowding drops the oil temperature and affects texture. Give each shell space to bubble and crisp evenly.
- Remove forms carefully while warm. Gently slide them out soon after frying so they don’t stick as the shells cool.
- Cool completely before filling. Warm shells will melt the filling and ruin that creamy texture.
- Fill just before serving. This keeps your Homemade Cannoli perfectly crisp with that signature crunch.
How to Make Homemade Cannoli
Now let’s make Homemade Cannoli step by step. Take your time and enjoy the process—you’re building something truly special.
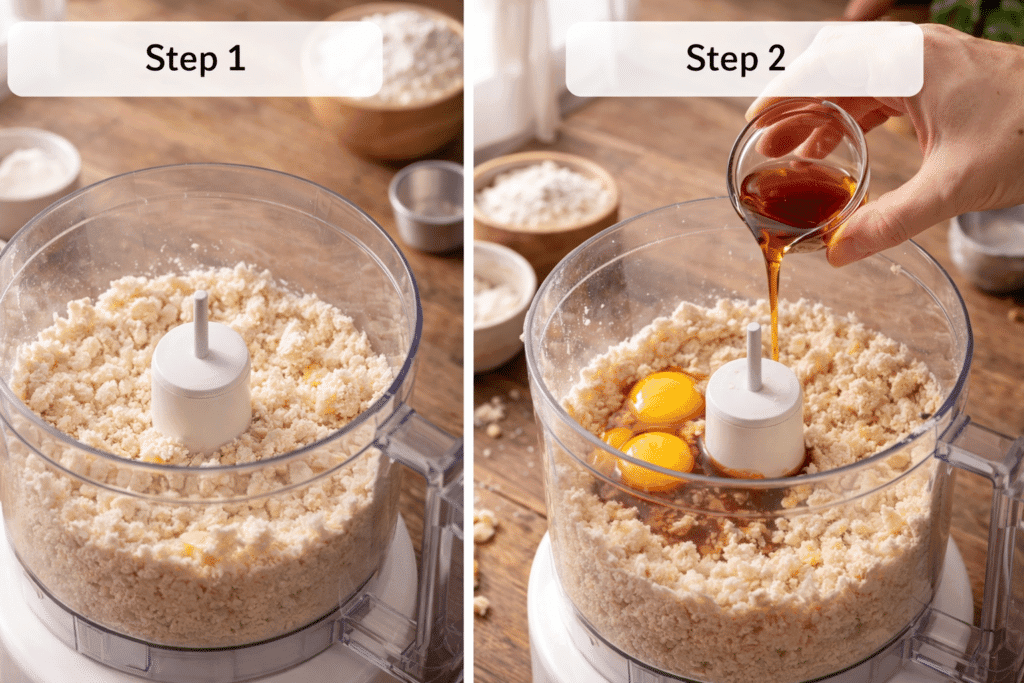
Step 1: Start by making the dough. Add the flour, sugar, and salt to a food processor and pulse to combine. Add the cold butter cubes and pulse until the mixture looks slightly crumbly with small butter pieces throughout.
Step 2: Add the egg yolks and marsala wine. Pulse until the dough begins to clump together. If it looks dry, add a little more marsala, one tablespoon at a time, until it forms a cohesive dough.
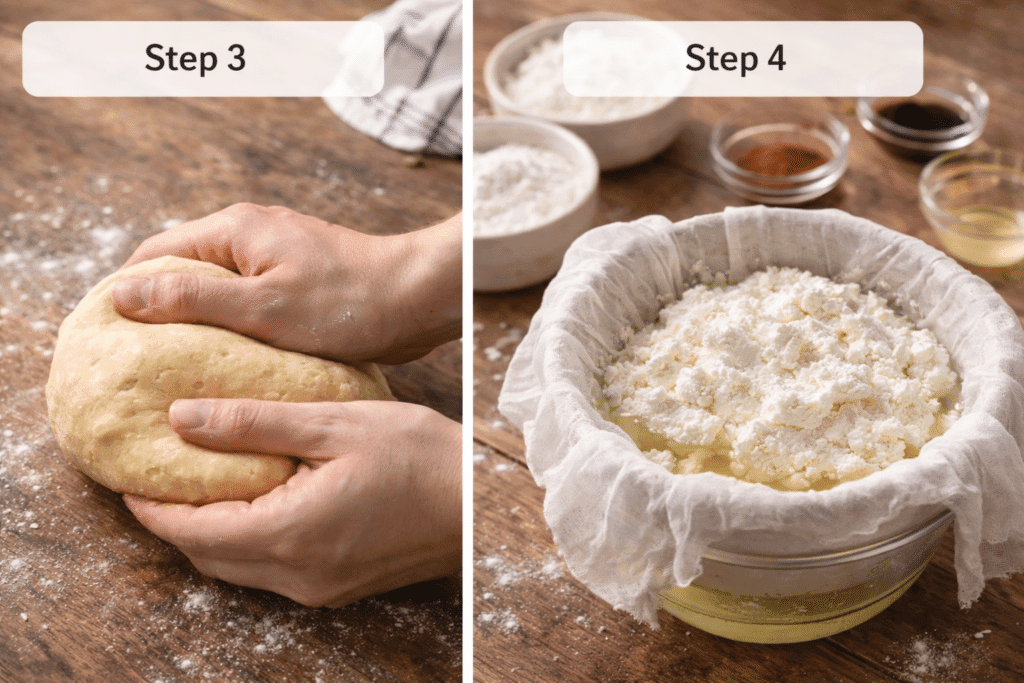
Step 3: Turn the dough onto a lightly floured surface and knead for 3–4 minutes until smooth and elastic. Cover it and let it rest at room temperature for one hour. This rest period makes rolling much easier.
Step 4: While the dough rests, prepare the filling. Drain the ricotta using cheesecloth or layered paper towels. Once thick, stir it together with powdered sugar, mini chocolate chips, vanilla, and cinnamon. Cover and chill until ready to use.
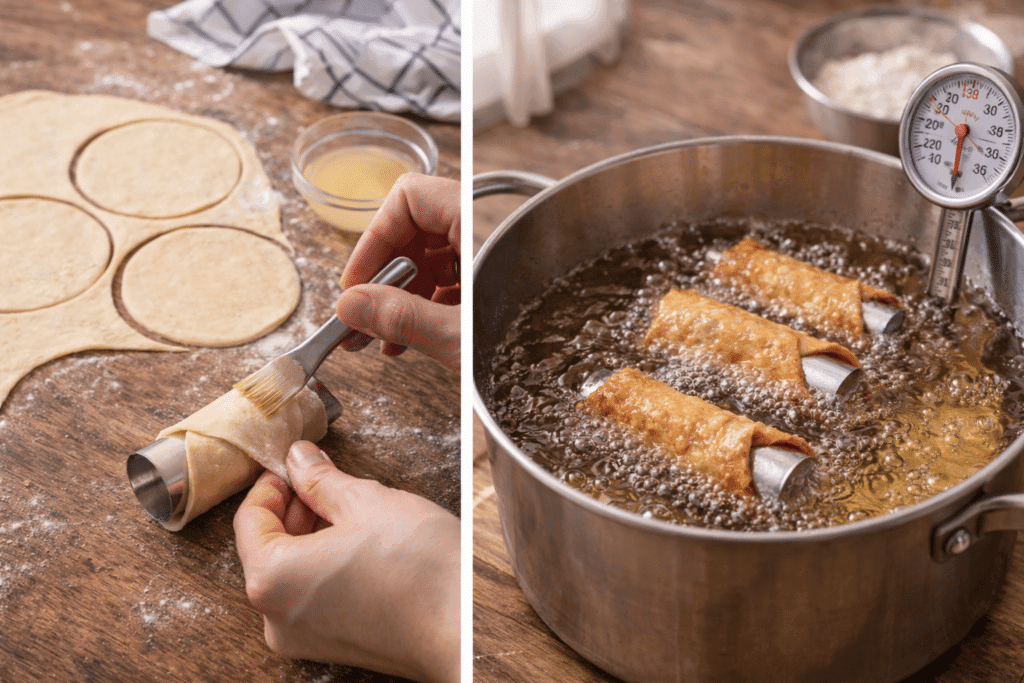
Step 5: Roll the rested dough to about ⅛-inch thickness. Cut eighteen 4-inch circles. If needed, re-roll scraps after letting them rest briefly. Wrap each circle around a metal cannoli form, brush egg white on the edge, and press to seal.
Step 6: Heat vegetable oil in a large pot to 360°F. Fry the wrapped shells in batches for about two minutes until deep golden brown. Turn them as needed so they brown evenly.
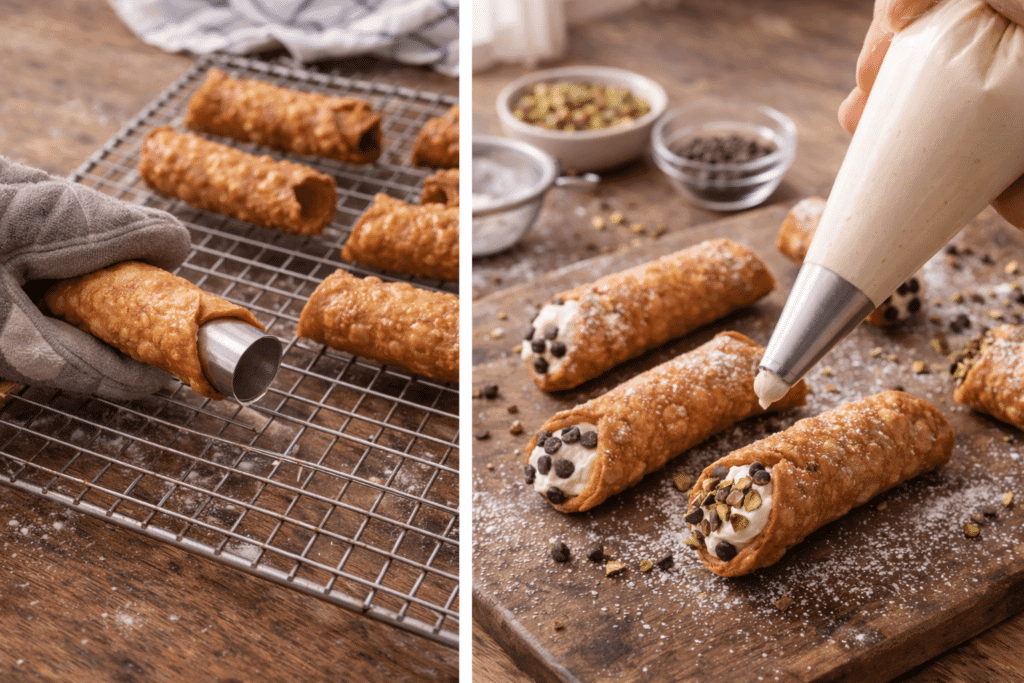
Step 7: Transfer the fried shells to a paper towel-lined wire rack. While still warm, carefully remove the metal forms. Let the shells cool completely before filling.
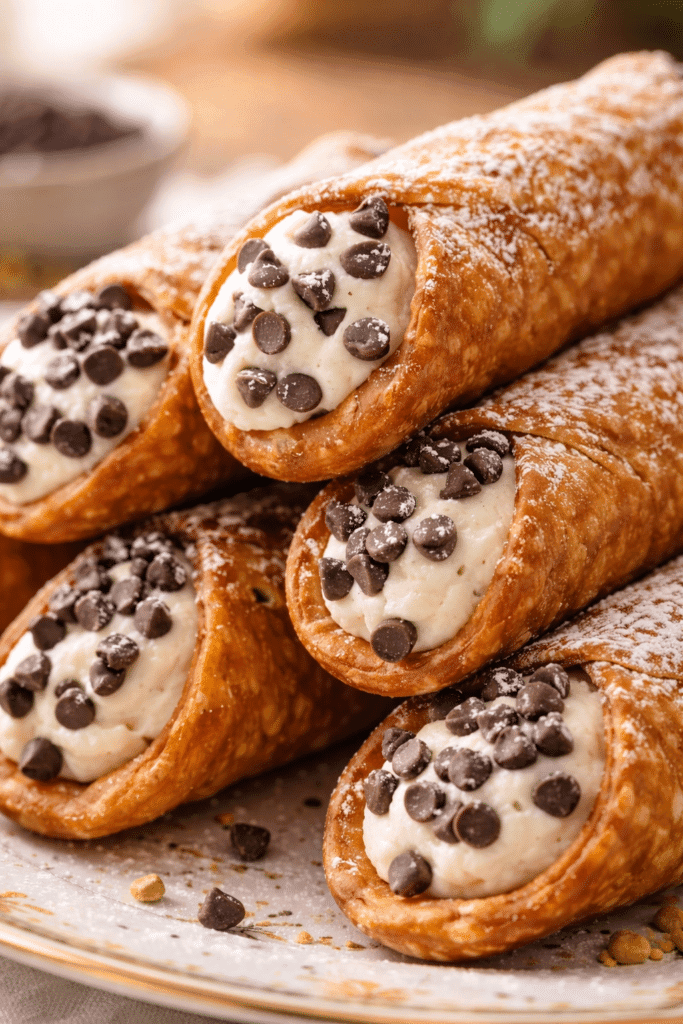
Step 8: Spoon the chilled filling into a piping bag. Pipe the filling into each cooled shell from both ends toward the center. Garnish with extra chocolate chips or chopped pistachios and dust lightly with powdered sugar before serving.
Serving Suggestions
Homemade Cannoli shine brightest when you serve them fresh and crisp, ideally within an hour of filling. Arrange them on a simple white platter and dust lightly with powdered sugar right before bringing them to the table. That final touch makes them look elegant and bakery-worthy.
If you’re hosting, pair your Homemade Cannoli with strong espresso or cappuccino to balance the sweetness. For family gatherings, serve them alongside fresh berries to add brightness and color to the dessert table.
During the holidays, place them next to other Italian favorites like tiramisu or biscotti for a festive spread. You can even dip the ends in melted chocolate before adding pistachios for extra flair.
No matter how you serve them, keep the shells crisp and the filling chilled until the last moment for the best texture.
Storage & Make-Ahead Tips
Homemade Cannoli taste best freshly filled, but you can easily prepare components ahead of time. Store unfilled shells in an airtight container at room temperature for up to three days. Keep them in a cool, dry spot so they stay crisp. Meanwhile, refrigerate the ricotta filling in a tightly sealed container for up to three days. Stir it before piping to restore its creamy texture.
If you want to freeze the shells, let them cool completely, then place them in a freezer-safe container with parchment between layers. Freeze for up to one month and thaw at room temperature before filling. Avoid freezing filled Homemade Cannoli, since moisture softens the shells and affects texture.
A Personal Note from My Kitchen
Homemade Cannoli bring such joy to our table. Every time I fry a batch, the kitchen fills with warmth and anticipation. I hope you feel proud making these from scratch and share them with people you love. From my Los Angeles kitchen to yours, enjoy every crisp, creamy bite.
Frequently Asked Questions
Can I make Homemade Cannoli shells without wine?
Yes, you can substitute marsala wine with white wine or even apple juice in a pinch. However, marsala gives Homemade Cannoli their traditional flavor and helps create those signature bubbles in the shells. If you replace it, expect a slightly different taste and texture. Add the liquid gradually so the dough stays smooth and workable.
Why do my cannoli shells blister when frying?
Those blisters are actually a good sign. Properly rested dough and the acidity in marsala wine create steam pockets during frying. That reaction forms the light, bubbly texture that makes Homemade Cannoli shells crisp and delicate.
How do I keep cannoli filling from being runny?
Always drain the ricotta thoroughly before mixing. Excess moisture causes thin filling. Chill the mixture at least one hour before piping so it firms up and holds its shape inside the shells.
Can I make Homemade Cannoli ahead of time?
You can prepare the shells and filling separately up to three days in advance. Store shells at room temperature and refrigerate the filling. Fill them shortly before serving to keep that perfect crisp texture.
Homemade Cannoli with Creamy Ricotta
Homemade Cannoli with crisp, golden pastry shells and sweet ricotta filling studded with mini chocolate chips. This classic Italian dessert tastes fresh, creamy, and perfectly balanced.
- Prep Time: PT1H30M
- Cook Time: PT20M
- Total Time: PT1H50M
- Yield: 18 cannoli 1x
- Category: Dessert
- Method: Frying
- Cuisine: Italian
Ingredients
2 cups all-purpose flour
2 tablespoons granulated sugar
1/4 teaspoon salt
2 tablespoons unsalted butter, cubed
1/2 cup marsala wine
2 large egg yolks
2 quarts vegetable oil for frying
32 ounces whole milk ricotta, drained
1 cup powdered sugar
1/3 cup mini chocolate chips
1 teaspoon vanilla extract
1/4 teaspoon cinnamon
Mini chocolate chips for garnish
Finely chopped pistachios for garnish
Instructions
Step 1: Add flour, sugar, and salt to a food processor and pulse to combine. Add butter and pulse until crumbly.
Step 2: Add egg yolks and marsala wine. Pulse until the dough begins to clump together.
Step 3: Turn dough onto a lightly floured surface and knead for 3 to 4 minutes until smooth. Cover and rest for 1 hour.
Step 4: Drain the ricotta thoroughly. Mix with powdered sugar, chocolate chips, vanilla, and cinnamon. Chill until ready to use.
Step 5: Roll dough to 1/8-inch thickness. Cut 4-inch circles and wrap around cannoli forms. Seal edges with egg white.
Step 6: Heat oil to 360°F and fry shells in batches until deep golden brown.
Step 7: Transfer to a rack and carefully remove metal forms while warm. Cool completely.
Step 8: Pipe filling into cooled shells. Garnish with chocolate chips or pistachios and dust with powdered sugar before serving.
Notes
Drain ricotta very well to prevent runny filling.
Fill shells shortly before serving to keep them crisp.
Store shells and filling separately if making ahead.
Nutrition
- Serving Size: 1 cannoli
- Calories: 280
- Sugar: 14g
- Sodium: 85mg
- Fat: 16g
- Saturated Fat: 7g
- Unsaturated Fat: 7g
- Trans Fat: 0g
- Carbohydrates: 28g
- Fiber: 1g
- Protein: 6g
- Cholesterol: 45mg
Keywords: Homemade Cannoli, Italian dessert, ricotta cannoli