
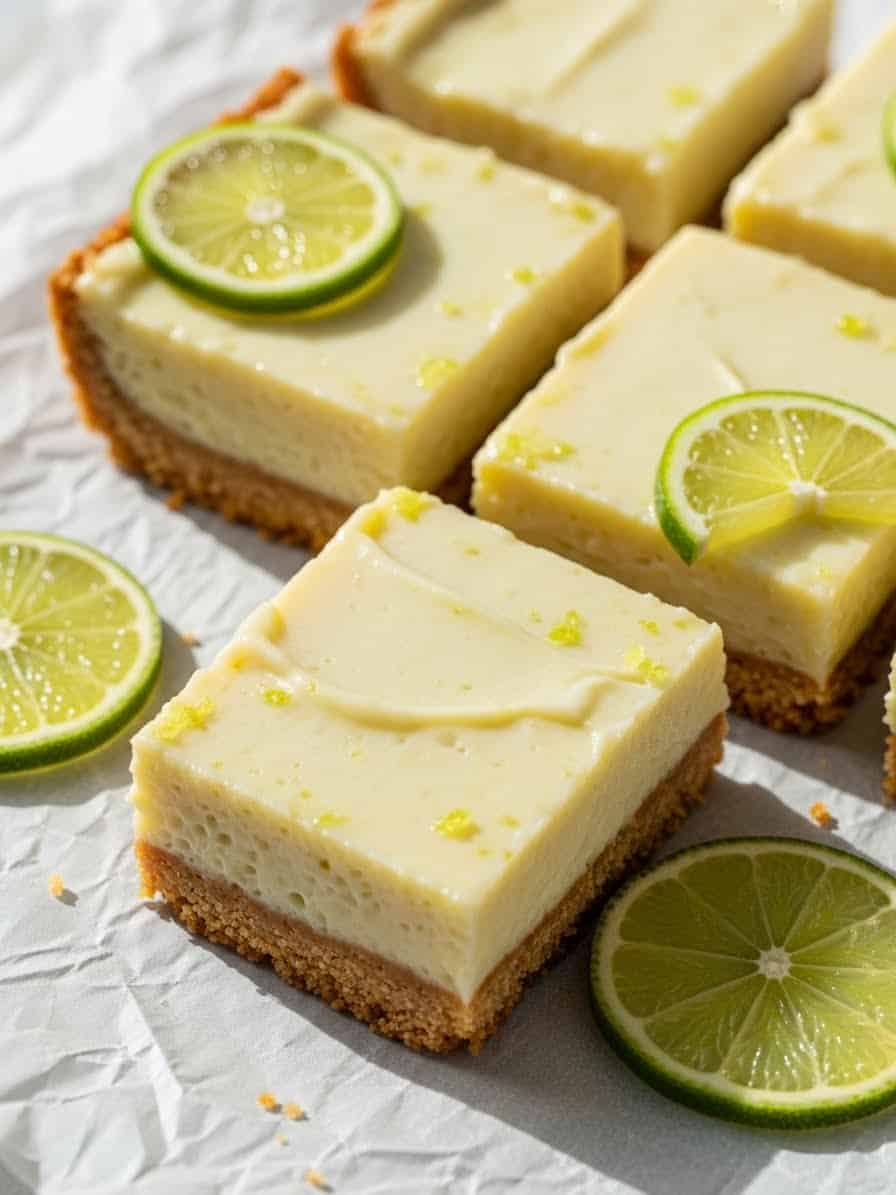
Key Lime Pie Bars have a special place in my kitchen and my heart. When I close my eyes and think of summer, I can almost feel the Florida sun warming my face and taste the tang of key lime pie on my tongue. It all started years ago when Daniel and I took a spontaneous weekend trip to the Florida Keys. We found a tiny café tucked beside a turquoise bay, and there it was — the most perfect, creamy slice of key lime pie. Every bite was bright, silky, and kissed with citrus. I came home determined to capture that memory in my kitchen.
After a few sweet experiments (and a few crumbly failures), these Key Lime Pie Bars were born. They’re everything I love about the classic pie, but easier to share — buttery graham crust, smooth custard filling, and a zing of real key lime juice that makes each bite come alive. I usually make them in my small Los Angeles kitchen on warm weekends while Hannah and Jessica sneak spoonfuls of whipped cream.
There’s something about these Key Lime Pie Bars that just makes people happy. They’re fresh enough for summer picnics, elegant enough for dinner parties, and simple enough to bake on a quiet Sunday afternoon. And the best part? You only need a handful of ingredients and one bowl to whisk it all together. Whether you use bottled or fresh key lime juice, they’re a sweet reminder that sunshine can be baked right into a dessert.
Table of Contents
6 Key Ingredients
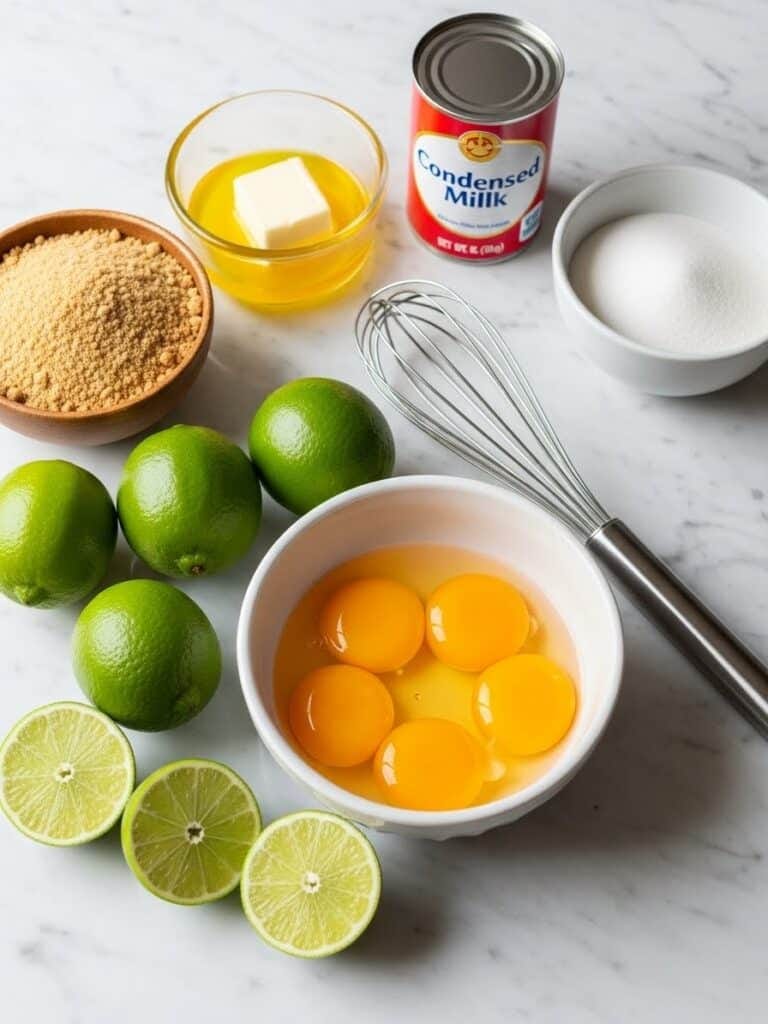
What makes Key Lime Pie Bars so special isn’t just their tangy flavor or creamy texture — it’s how six simple ingredients come together to create a dessert that tastes like pure sunshine. Every ingredient has a purpose, and when they work in harmony, you get a perfect balance of tart, sweet, and buttery goodness that melts in your mouth.
Simple Pantry Staples With Big Flavor
These Key Lime Pie Bars start with a handful of familiar staples that most home bakers already have. The crust begins with graham cracker crumbs, which bring a comforting, toasted flavor and just the right crunch. Granulated sugar sweetens the base while helping the crumbs caramelize slightly as they bake, creating that golden-brown edge everyone loves. A pinch of salt might seem small, but it’s the secret ingredient that enhances every other flavor in the recipe — balancing sweetness and deepening the citrus tang.
Then comes the unsalted butter, melted and mixed through the crumbs to create that perfect buttery base. When pressed and baked, it forms a crisp foundation that holds up beautifully beneath the creamy filling.
Why These Ingredients Matter
The filling is where the magic happens. Egg yolks give the custard its silky texture, thickening the mixture while adding richness and warmth. Sweetened condensed milk delivers smooth sweetness and structure — it’s what makes the filling firm yet soft when chilled. Finally, key lime juice adds the signature tart brightness that defines this dessert. Whether you use fresh or bottled juice, the citrus cuts through the richness and makes every bite shine.
For a final touch, a bit of lime zest ties everything together, giving your Key Lime Pie Bars that irresistible aroma and a pop of color. With these six simple ingredients, you’ll have a dessert that’s easy to make yet unforgettable in flavor.
How To Make Key Lime Bars
The best part about Key Lime Pie Bars is how effortlessly they come together. With one bowl, a mixer, and a few simple steps, you’ll have a bakery-quality dessert that looks as good as it tastes.
The Step-by-Step Process
Start by preheating your oven to 350°F. Lightly grease an 8×8-inch pan and line it with parchment paper, leaving an overhang on two sides. This trick makes lifting out your bars super easy once they’ve chilled.
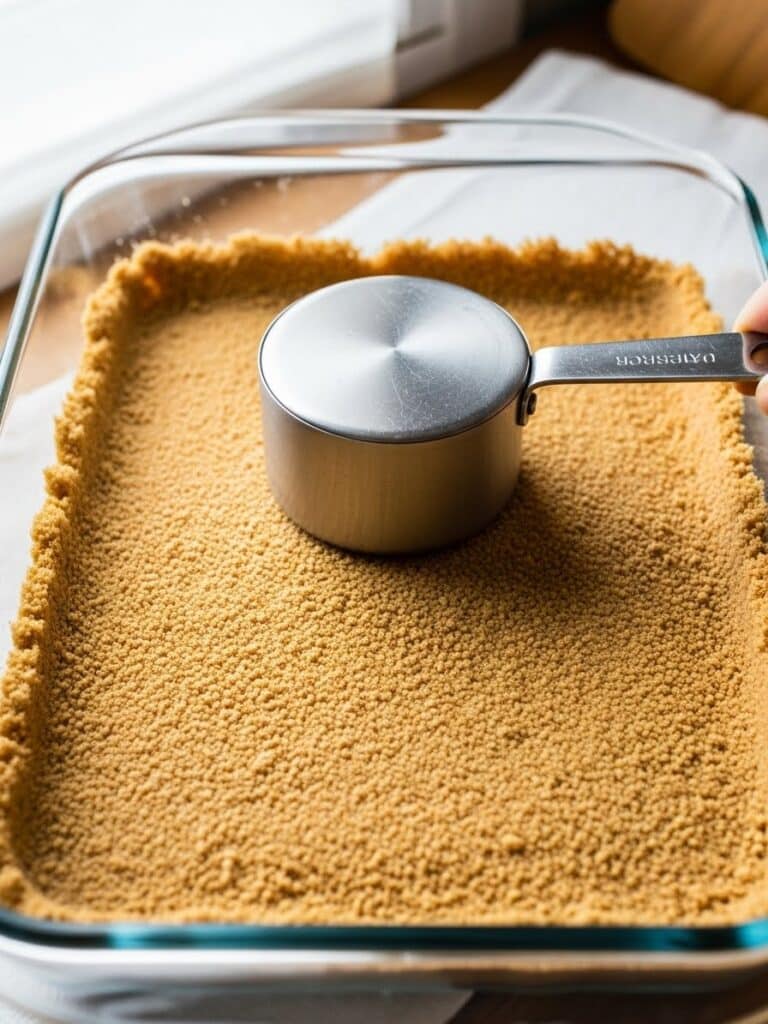
In a large bowl, mix graham cracker crumbs, sugar, salt, and melted butter until the crumbs hold together when pressed between your fingers. This is the secret to that crisp, buttery crust that never crumbles apart. Press the mixture firmly into your pan with a flat-bottomed glass or measuring cup — no loose edges allowed! Bake for 10–12 minutes until golden brown.
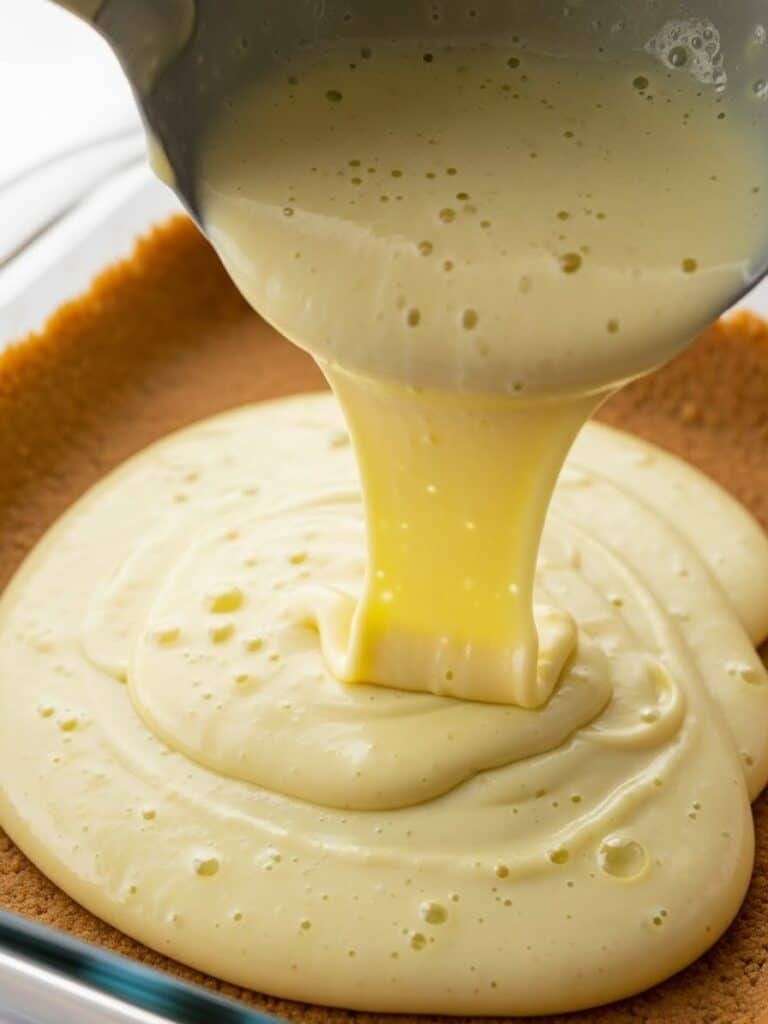
While the crust cools slightly, reduce your oven to 325°F. In another bowl, whisk egg yolks for one minute until slightly thickened and lighter in color. Add sweetened condensed milk, whisk again, then stir in key lime juice and lime zest until smooth. Pour the luscious filling over the warm crust, smoothing it evenly to the corners.
Bake for 12–15 minutes, just until the filling is set but still a little jiggly in the center — that’s how you know it’s perfect. Let the bars cool completely at room temperature before refrigerating for at least 4 hours. The wait is worth it; chilling transforms the filling into that dreamy, creamy texture we love.
Making the Perfect Crumb Crust
A good crust can make or break these bars. The key is pressure and precision. When pressing the crumbs, don’t rush — a firm, even layer prevents crumbling later. If your crust feels sandy or dry, add one more tablespoon of melted butter until it sticks together like damp sand. Overmixing, however, can make it greasy, so add slowly.
Once baked, the crust should feel slightly firm and smell lightly toasted. Avoid overbaking, or it will harden too much to cut cleanly. When cooled and filled, that buttery graham layer becomes the golden base that supports each creamy square of tangy sweetness.
Should I Use Fresh or Bottled Key Lime Juice?
When it comes to making Key Lime Pie Bars, the lime juice you choose can make a real difference in both taste and texture. Fresh key lime juice delivers that unmistakable tangy punch — bright, floral, and just the right amount of tart. But let’s be honest: squeezing dozens of tiny key limes can feel like a workout. Luckily, both fresh and bottled options can produce beautiful results if you know how to use them.
The Fresh Key Lime Advantage
There’s something almost magical about fresh key lime juice. The aroma hits the moment you slice into a lime — sharp and citrusy with a whisper of sweetness. Fresh juice gives your filling a cleaner, livelier flavor and slightly creamier texture. It’s the best choice when key limes are in season, especially if you want that authentic Florida Keys flavor that started it all.
When I have time, I zest the limes first, then juice them using a handheld reamer. The zest adds an extra layer of fragrance that deepens the flavor without making it too sour. This small step turns the bars into something you’d proudly serve at any summer gathering.
When Bottled Works Just Fine
Don’t worry if fresh key limes aren’t available. A good-quality bottled key lime juice works beautifully for Key Lime Pie Bars, especially during the winter months. Look for labels that say “100% Key Lime Juice” with no added sugar or preservatives. I’ve tested several brands over the years, and honestly, the difference is subtle once baked.
One tip I swear by: give bottled juice a quick shake before using — it helps redistribute the natural oils that tend to settle.
How To Serve
There’s nothing quite like that first chilled bite of Key Lime Pie Bars — creamy, tangy, and smooth against the buttery crunch of the graham crust. Whether you’re hosting a summer cookout or simply ending a weeknight meal on a sweet note, how you serve these bars can take them from simple to unforgettable.
Presentation Ideas for Every Occasion
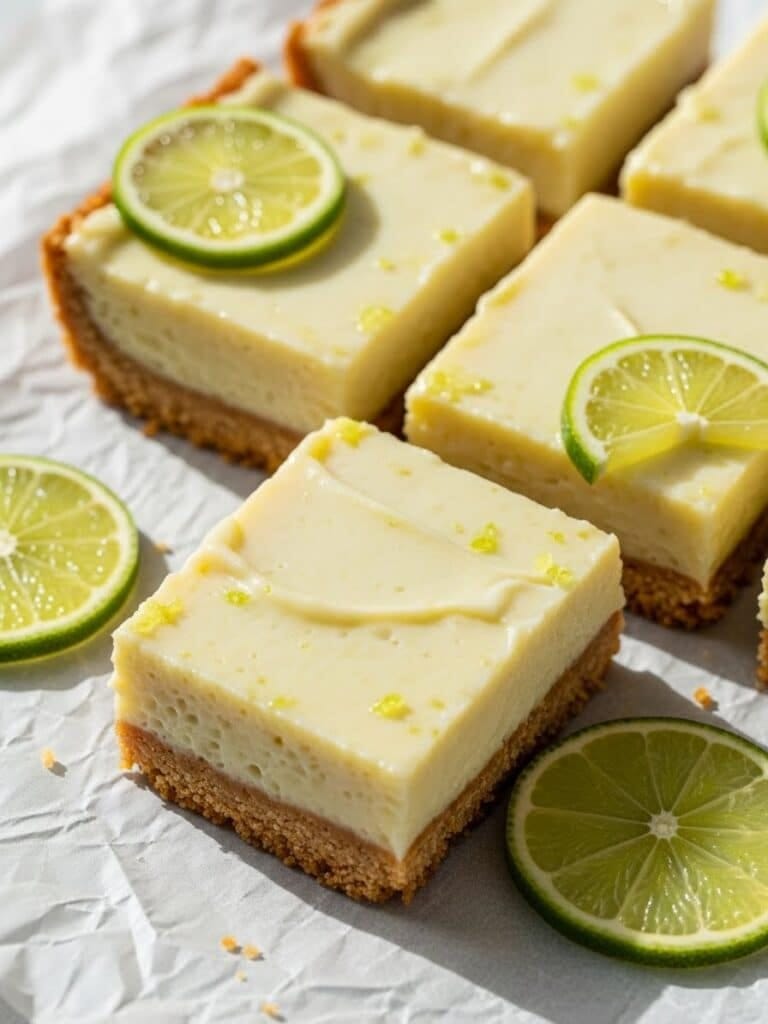
For casual family dinners, I like to cut the bars into neat squares and serve them straight from the pan, topped with a generous dollop of whipped cream. A light dusting of lime zest adds a pop of color and just the right hint of fragrance. If you’re entertaining, try adding a thin slice of key lime or a sprinkle of crushed graham crackers on top — it instantly gives the dessert a bakery-style finish.
You can also dress them up on a dessert platter with a swirl of whipped cream piped along the edges. The contrast between the pale green filling and the golden crust looks beautiful and makes each square feel like its own little treat. For an elegant twist, serve each bar on a chilled white plate with a drizzle of condensed milk or a tiny wedge of candied lime.
Pairings That Compliment
These Key Lime Pie Bars shine on their own, but pairing them with the right drink makes the flavors bloom even more. A tall glass of iced tea or coconut coffee balances the citrus perfectly, while sparkling water with a mint leaf adds a refreshing touch.
The tropical flavor pairing is a crowd favorite — creamy, chewy, and bright all at once. For a cozy touch in cooler weather, they’re surprisingly good with hot green tea or vanilla bean latte.
No matter how you serve them, keep the bars chilled until the very last minute. That cool, firm texture is part of what makes them so irresistible — and one bite is all it takes to understand why this dessert never lasts long in my kitchen.
How To Store
After you’ve sliced into your beautiful pan of Key Lime Pie Bars, it’s important to store them correctly to keep that creamy texture and bright flavor intact. These bars are made to be enjoyed chilled, so proper storage isn’t just convenient — it’s essential for keeping their signature smoothness.
Short-Term Storage
If you’re planning to serve the bars within a few days, keep them in the refrigerator. I like to cover the pan with a sheet of aluminum foil instead of plastic wrap — foil won’t stick to the top or damage the silky filling. The bars will stay perfectly fresh and firm for up to four days.
If you’ve already cut them into squares, arrange them in a single layer in an airtight container. Slip a piece of parchment paper between layers if you’re stacking them. This prevents sticking and keeps each bar looking clean and beautiful when you’re ready to serve again.
Longer Storage and Freezing Tips
Want to make your Key Lime Pie Bars ahead of time? They freeze wonderfully. Once completely chilled, wrap individual bars tightly in plastic wrap, then place them in a freezer-safe bag or container. They’ll keep for up to two months without losing their creamy consistency.
When you’re ready to enjoy them, simply transfer the bars to the refrigerator overnight to thaw. They’ll taste just as smooth and tangy as the day you made them. I’ve even frozen a batch before a family trip so we’d have dessert ready when we got home — one of my favorite little time-saving tricks.
Pro Tips for Making This Recipe
Even though Key Lime Pie Bars are simple to make, a few small steps can make the difference between good and absolutely amazing. These tips come straight from my home kitchen after plenty of trial, error, and sweet success.
Common Mistakes to Avoid
The most common issue is overbaking. The filling should be set but still slightly wobbly in the center — it will firm up as it cools. Overbaking can cause cracks and a rubbery texture. Another mistake? Using regular limes instead of key limes. While both are delicious, regular limes are less tart and slightly bitter, changing that signature flavor.
Avoid pressing the crust too loosely or skipping the parchment sling. Both make the bars hard to remove and can lead to uneven layers. And never cover the surface with plastic wrap while chilling — it sticks to the top and ruins the smooth finish. A simple sheet of foil is all you need.
Chef-Approved Secrets for Perfect Bars
Zest your limes before juicing them. It’s easier, and you’ll capture every bit of aromatic oil for deeper flavor. Use room-temperature egg yolks so they whisk smoothly with the condensed milk, giving the filling its creamy texture. Chill the bars for at least four hours (overnight if possible) before slicing — it helps achieve those clean, picture-perfect squares.
When cutting, run a sharp knife under hot water and wipe it dry between slices. It’s a tiny step that makes a big visual difference.
Once you’ve mastered these little details, your Key Lime Pie Bars will turn out bakery-beautiful every single time — silky, balanced, and bursting with that signature citrus glow.
Conclusion
Every time I make Key Lime Pie Bars, I’m reminded that some of the best desserts don’t need to be complicated. Just a few ingredients, a whisk, and a little patience can turn simple pantry staples into something magical. These bars capture everything I love about baking — the smell of butter and lime in the air, the sound of laughter coming from the next room, and the joy of sharing something homemade with the people I love most.
From that first taste of key lime pie in the Florida Keys to countless batches tested in my Los Angeles kitchen, this recipe has become a family favorite. Daniel still says the first bite takes him straight back to that little seaside café, and the girls race to claim the corners with the most crust. For me, that’s what makes these bars special — they’re more than a dessert. They’re a slice of sunshine, a bit of memory, and a whole lot of heart.
So the next time you need a simple, crowd-pleasing dessert, whip up a batch of these Key Lime Pie Bars. They’re sweet, tart, creamy, and perfectly chilled — a reminder that joy often comes in the simplest, zestiest packages.
If you’re craving more dessert bar inspiration after these Key Lime Pie Bars, you’ll love exploring a few of my other reader favorites. For a rich, chocolatey twist, try my Brookies — half brownie, half cookie, and totally indulgent. If you’re into layered treats, my buttery Millionaire’s Shortbread brings that classic caramel-and-chocolate combination everyone adores. Love citrus? My Lemon Bars Recipe is just as tangy and bright as these key lime bars, but with a sunny lemon kick. For an easy crowd-pleaser, bake up my chewy Chocolate Chip Cookie Bars — simple, nostalgic, and perfect for every season. And if you’re in the mood for something extra decadent, don’t miss my gooey Caramel Brownies — pure comfort in every bite.
Frequently Asked Questions
What are the ingredients in Key Lime Pie Bars?
The essential ingredients in Key Lime Pie Bars are simple but powerful. You’ll need graham cracker crumbs, sugar, salt, and butter for the crust. The filling comes together with egg yolks, sweetened condensed milk, key lime juice, and a touch of lime zest. Topped with a little whipped cream or thin lime slices, every component brings brightness, balance, and that irresistible creamy texture.
What is the secret to a good key lime pie?
The secret to any great key lime dessert — including Key Lime Pie Bars — is balance. The filling should be perfectly smooth with the right mix of tart and sweet. Using fresh key lime juice when possible gives the bars their bright, authentic flavor, while proper chilling ensures a clean cut and velvety texture. Always let them rest in the fridge for at least four hours before serving for the best consistency.
What is the best crust for key lime bars?
A graham cracker crust is hands down the best choice. It adds a buttery crunch that contrasts beautifully with the silky lime filling. The slight caramel flavor from the baked crumbs pairs perfectly with the citrus tang. If you love experimenting, try using vanilla wafers or crushed shortbread for a slightly different texture — both work wonderfully with lime desserts.
What is so special about key lime pie?
Key lime pie (and by extension, Key Lime Pie Bars) stands out because of its signature tangy, tropical flavor. Made with key limes — smaller and more aromatic than standard limes — this dessert has a unique sweet-tart balance that feels both rich and refreshing. It’s a taste of the Florida Keys in every bite, offering that unmistakable blend of sunshine, creaminess, and nostalgia that makes it so beloved.
Key Lime Pie Bars
Creamy, tangy, and irresistibly easy, these Key Lime Pie Bars combine a buttery graham cracker crust with a smooth key lime filling — perfect for summer gatherings or anytime you crave a refreshing citrus treat.
- Prep Time: 15 mins
- Cook Time: 25 mins
- Total Time: 40 mins + 4 hrs chill
- Yield: 16 bars 1x
- Category: Dessert
- Method: Baking
- Cuisine: American
- Diet: Vegetarian
Ingredients
Crust:
1½ cups graham cracker crumbs (180g)
¼ cup granulated sugar (50g)
¼ teaspoon salt
6 tablespoons unsalted butter, melted (85g)
Filling:
3 large egg yolks
1 (14-ounce/396g) can sweetened condensed milk
½ cup key lime juice (120mL)
1 teaspoon lime zest
Topping:
2 cups whipped cream
2 key limes, thinly sliced
Instructions
1. Preheat oven to 350°F and grease an 8×8-inch pan.
2. Mix graham cracker crumbs, sugar, salt, and melted butter until combined.
3. Press mixture into pan and bake 10–12 minutes until golden.
4. Reduce oven temperature to 325°F.
5. Whisk egg yolks until pale, add condensed milk, then mix in lime juice and zest.
6. Pour filling over crust and bake 12–15 minutes, until just set.
7. Cool to room temperature, then refrigerate for 4 hours.
8. Top with whipped cream and lime zest before serving.
Notes
For easy removal, use parchment with a 2-inch overhang.
Avoid plastic wrap when chilling — use foil to protect the surface.
You can use bottled key lime juice if fresh isn’t available.
Nutrition
- Serving Size: 1 bar
- Calories: 260
- Sugar: 22g
- Sodium: 150mg
- Fat: 12g
- Saturated Fat: 7g
- Unsaturated Fat: 4g
- Trans Fat: 0g
- Carbohydrates: 32g
- Fiber: 1g
- Protein: 5g
- Cholesterol: 80mg
Keywords: Key Lime Pie Bars, key lime dessert, lime bars