
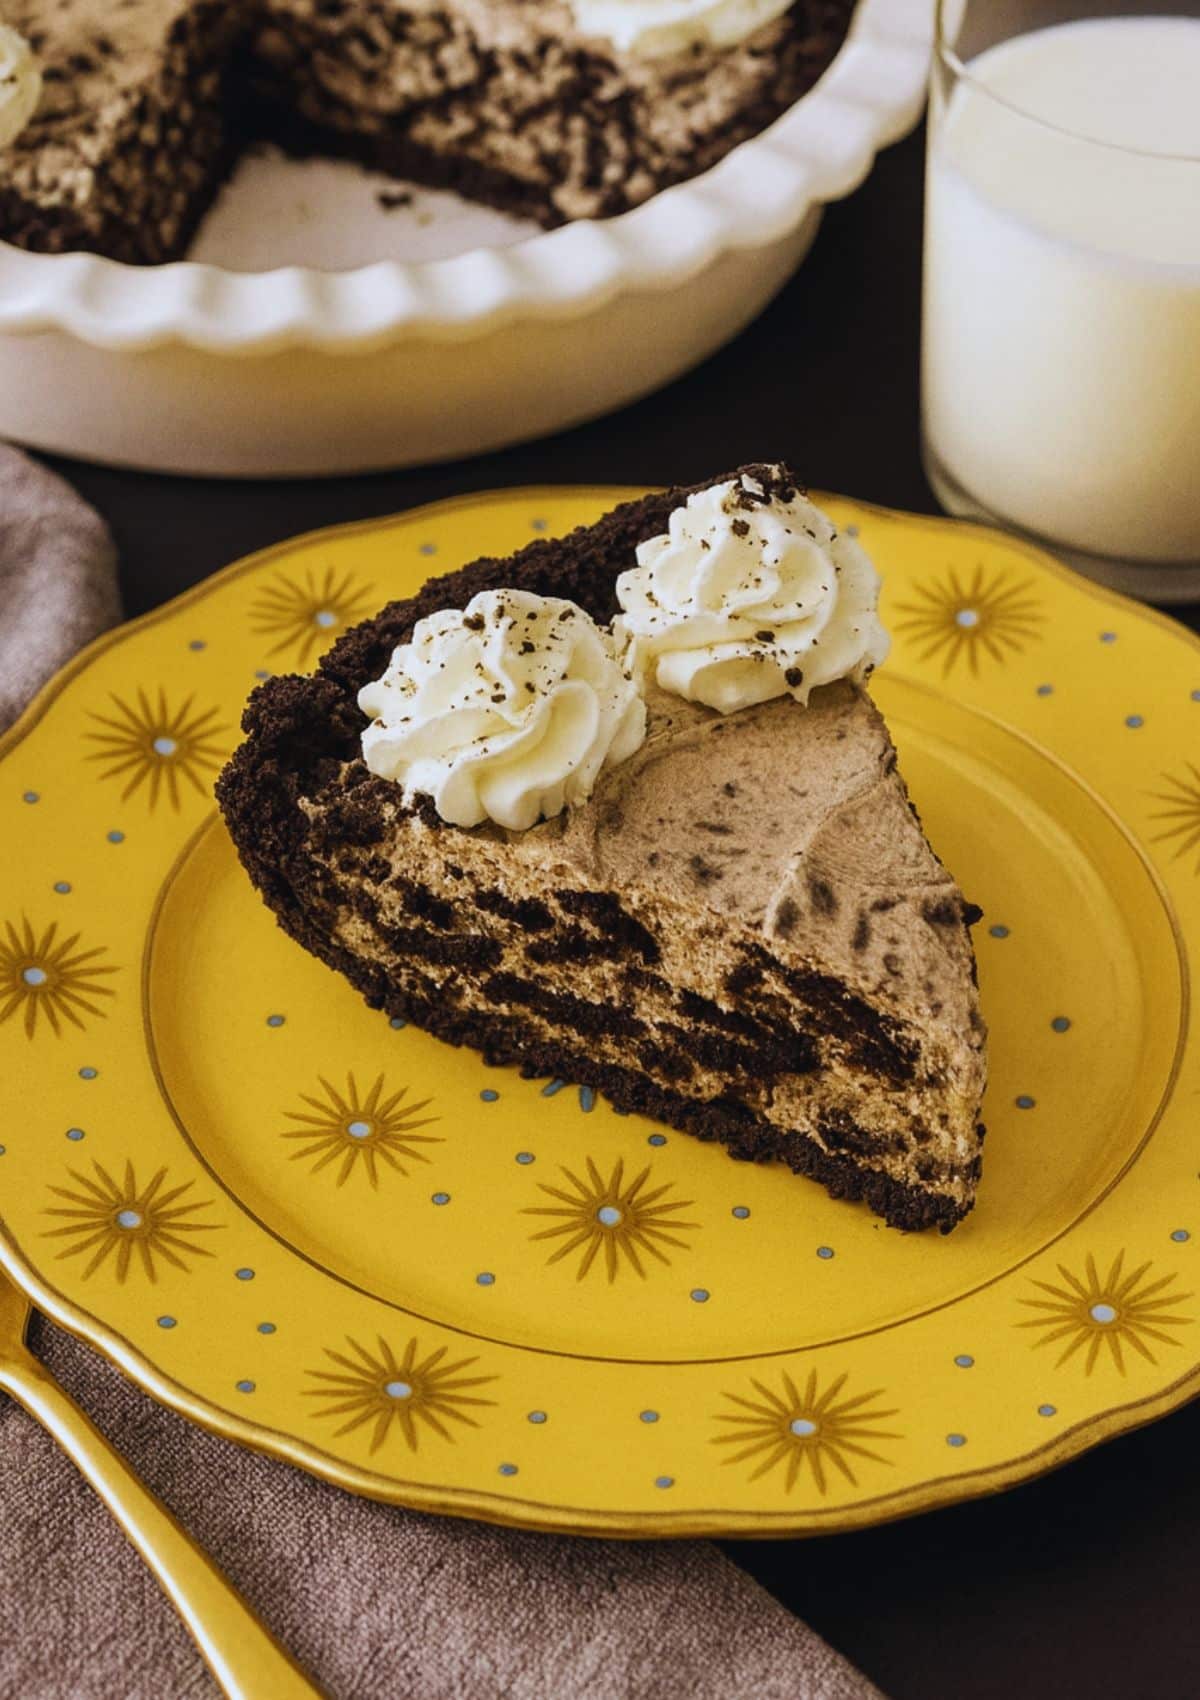
Oreo Pie brings instant joy to any table. I make it whenever my family craves something sweet, creamy, and easy. This no-bake dessert delivers everything you want in a single slice—a crunchy Oreo crust, a light whipped filling, and the perfect cookies-and-cream flavor that never fails to impress.
I first made Oreo Pie one hot Los Angeles afternoon when I refused to turn on the oven. Daniel had just finished an architectural project, and I wanted a chilled dessert to celebrate. I crushed the cookies, whipped the cream, and poured it all into a pan. A few hours later, that first slice changed how I saw no-bake desserts forever.
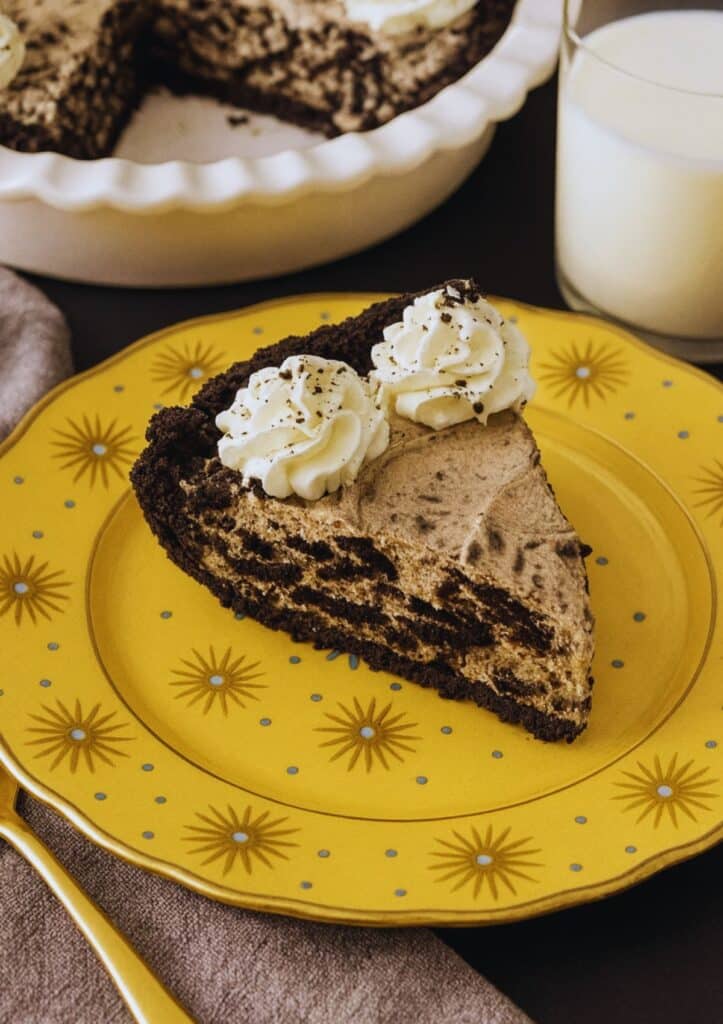
Now, I make this pie often in my cozy home test kitchen. Hannah and Jessica love pressing the cookie crust into the pan while sneaking a few pieces, of course. My parents, George and Eleanor, call it a “modern icebox pie,” while Daniel’s parents, Thomas and Margaret, request it for every visit. Everyone agrees—it’s the kind of dessert that feels fancy but takes almost no effort.
What makes this Oreo Pie stand out is its simplicity. You can make it ahead, freeze it, or customize it with different toppings for any occasion. The recipe uses basic pantry ingredients, yet the result tastes like something from a bakery. When life gets busy, this pie saves the day with minimal prep and maximum flavor.
In the next section, I’ll share the exact ingredients that make this pie smooth, rich, and irresistible, plus smart substitutions that work just as well. Get ready to see why this easy no-bake Oreo Pie belongs in every home baker’s collection.
Table of Contents
No-Bake Oreo Pie Ingredients & Substitutions
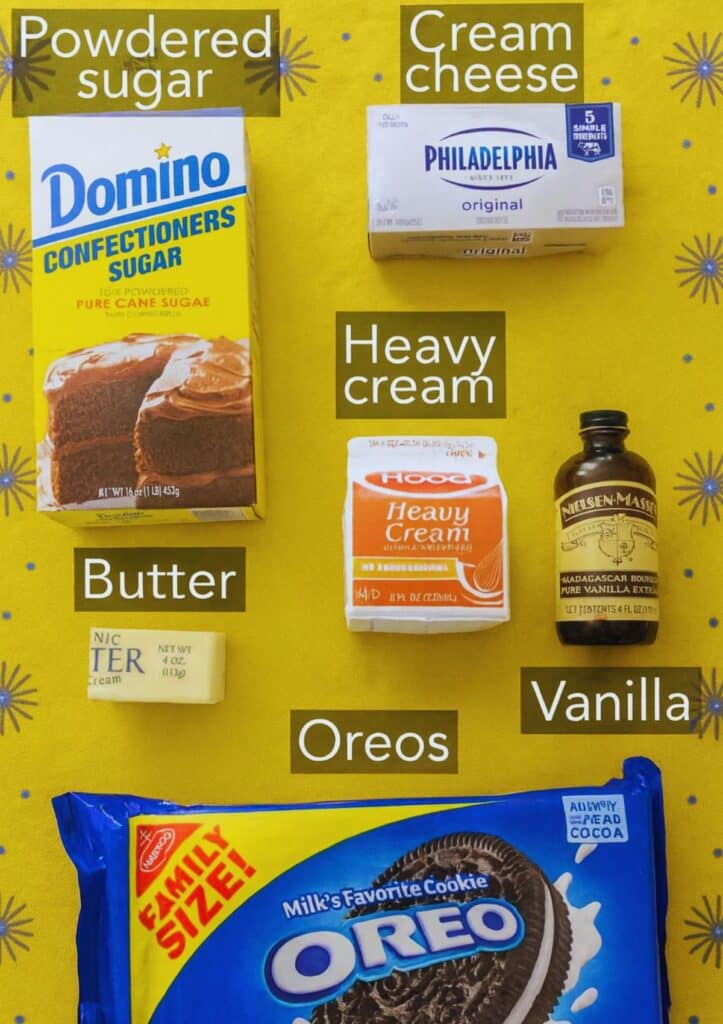
Oreo Pie uses simple, everyday ingredients that come together to create a dessert that feels indulgent but stays easy to make. Every component plays an important role, from the buttery Oreo crust to the creamy, whipped filling that sets beautifully in the fridge.
Start with the crust. I crush 24 Oreos and mix them with melted butter to form the base. The cookie crumbs give structure and deep chocolate flavor, while the butter binds everything together. If you’re short on time, use a store-bought Oreo crust—it works just as well and saves a few minutes.
For the filling, heavy whipping cream adds volume and lightness. Be sure to whip it until stiff peaks form, so your pie holds its shape. Cream cheese adds body and a subtle tang, balancing the sweetness of the cookies. Powdered sugar blends smoothly into the mix, keeping the texture silky instead of grainy. Vanilla extract brings a warm, fragrant note that ties the flavors together. Finally, the chopped Oreos fold in that classic crunch that makes this pie irresistible.
Need to make swaps? You can easily adjust without losing the pie’s signature flavor. Use Neufchâtel cheese instead of cream cheese for a lighter version. Swap regular Oreos for Golden Oreos to create a vanilla twist. For a dairy-free option, choose coconut whipped cream and vegan sandwich cookies. Even gluten-free Oreos hold up beautifully in this recipe.
Here’s a quick breakdown of the key ingredients and their substitutions:
| Ingredient | Possible Substitution |
|---|---|
| Heavy Whipping Cream | Coconut whipped cream or non-dairy alternative |
| Cream Cheese | Neufchâtel or vegan cream cheese |
| Oreo Cookies | Golden, mint, or gluten-free Oreos |
| Butter | Vegan butter or coconut oil |
Every swap changes the flavor slightly, but the pie always keeps its signature cookies-and-cream charm. Choose what fits your taste and dietary needs best.
How a No-Bake Pie Sets
Oreo Pie sets through a simple yet effective combination of chilling time and ingredient chemistry. Unlike baked pies that depend on heat to firm up, this dessert relies on the cold to stabilize its creamy layers. The key players—cream cheese, whipped cream, and melted butter—work together to form a soft yet sliceable texture that holds beautifully once chilled.
When you mix the cream cheese with confectioners’ sugar and vanilla, the sugar draws out a little moisture from the cheese, creating a smooth, rich base. Then, folding in the whipped cream adds lightness and air, which gives Oreo Pie its fluffy consistency. The filling needs at least six hours in the fridge to set properly, though overnight chilling gives it the best structure. During that time, the fats in the cream and butter solidify, locking the air inside and creating that luscious, stable filling we all love.
If your Oreo Pie feels too soft, you probably need a bit more chill time. Make sure the pie pan sits level in the refrigerator, and don’t skip the step of whipping the cream to stiff peaks—it’s what gives the filling strength. For a firmer slice, freeze the pie for about 45 minutes before serving. That quick chill makes clean cuts and keeps the crust intact.
Here’s a simple visual to guide your setting time:
| Chill Duration | Texture Result |
|---|---|
| 2–4 hours | Soft, scoopable filling |
| 6–8 hours | Firm, sliceable texture |
| Overnight | Perfectly stable and creamy |
A well-set Oreo Pie should hold its shape when sliced but melt on the tongue after the first bite.
Quick & Easy Variations Using Other Oreo Flavors
Oreo Pie adapts beautifully to any flavor of Oreo you love. I often switch up the cookie base depending on the season or occasion, and each version brings its own personality. The beauty of this no-bake dessert lies in how easily you can customize it without changing the basic method.
Start with Golden Oreos for a softer, vanilla-scented version. This one tastes light, buttery, and perfect for summer picnics or baby showers. Swap the crust and the chopped cookies for the golden kind, and you’ll have a sunshine-sweet pie that feels entirely new.
For a festive twist, use Mint Oreos around the holidays. The cool mint pairs beautifully with the creamy filling, and the pie takes on a refreshing flavor that guests always remember. Add a few crushed peppermint candies on top for sparkle and crunch.
When fall rolls around, Pumpkin Spice Oreos or Carrot Cake Oreos make the filling warm and cozy. The cinnamon and nutmeg notes give the pie an autumn feel, especially when topped with whipped cream and a sprinkle of crushed cookies.
If you want a richer flavor, go for Peanut Butter Oreos or Double Stuf Oreos. The extra filling gives the pie an indulgent texture, almost like a mousse. You can even mix two flavors—half classic, half peanut butter—for a marbled look and layered taste.
Here’s a quick flavor guide to inspire your next version of Oreo Pie:
| Oreo Flavor | Taste Profile | Best Occasion |
|---|---|---|
| Golden Oreo | Vanilla and buttery | Spring and summer gatherings |
| Mint Oreo | Cool and refreshing | Winter holidays |
| Peanut Butter Oreo | Rich and nutty | Game nights or birthdays |
| Pumpkin Spice Oreo | Warm and spiced | Fall gatherings |
Each variation keeps the same creamy texture while giving the dessert a new twist. The next section dives into pro tips for making the best Oreo Pie, ensuring your crust holds firm, your filling stays smooth, and your presentation wows every guest.
Pro Tips for Making the Best Oreo Pie
Oreo Pie turns out perfect every single time when you follow a few smart tricks. Over years of testing no-bake desserts in my kitchen, I’ve learned that the little details—like how you press the crust or whip the cream—make all the difference. These tips will help you achieve that flawless, creamy texture every baker dreams about.
First, start with properly crushed cookies. Finely grind your Oreos for the crust until the crumbs look like sand. Larger pieces prevent the crust from holding together, while overgrinding can make it too dense. I use a food processor, but a zip-top bag and rolling pin work just as well.
Next, press the crust firmly but gently. The goal is to create a tight, even base without crushing it too hard. Use the bottom of a measuring cup or glass to press down evenly. Freeze the crust for at least 30 minutes before filling—it locks the butter in place and keeps the base crisp.
Always whip the cream until stiff peaks form. Under-whipped cream makes the filling collapse, while over-whipped cream turns grainy. You’ll know it’s perfect when the peaks stand straight up and hold their shape.
When combining the whipped cream with the cream cheese mixture, fold gently. This step keeps the filling light and airy. If you stir too aggressively, you’ll lose the volume you just created.
Finally, chill your Oreo Pie for a full six hours (or overnight if possible). The extra time allows the flavors to blend and the texture to set. When ready to serve, slice with a warm knife for clean, smooth cuts.
Here’s a quick reference for pie perfection:
| Step | Pro Tip |
|---|---|
| Crushing Oreos | Crush finely but don’t over-pulverize. |
| Pressing Crust | Use a flat-bottomed cup for even pressure. |
| Whipping Cream | Stop when stiff peaks form to avoid graininess. |
| Folding Filling | Fold gently to keep the texture airy. |
| Chilling Time | Refrigerate 6+ hours or overnight for best set. |
Follow these steps, and your Oreo Pie will slice beautifully, taste incredible, and hold up perfectly at any gathering.
How to Make Oreo Pie
Oreo Pie comes together quickly and easily, using only a few ingredients and simple steps. You don’t need an oven, a fancy mixer, or any pastry skills—just a few bowls, a whisk, and a little patience while it chills. Follow these directions for the best texture and flavor every time.
Step 1: Prepare the Crust
Lightly coat a 9-inch pie pan with nonstick spray. Crush 24 Oreo cookies until they become fine crumbs. Mix in the melted butter until the texture feels like wet sand. Pour the mixture into the pan and press it evenly across the bottom and up the sides using a flat-bottomed glass or measuring cup. Freeze the crust for at least 30 minutes to set. This step keeps the crust crisp and prevents it from crumbling when you add the filling.
Step 2: Make the Filling
In a large bowl, whip the heavy cream on medium-high speed until stiff peaks form—about two minutes. In another bowl, beat the cream cheese until smooth and fluffy, then add the powdered sugar and vanilla extract. Blend until creamy. Gently fold the whipped cream into the cream cheese mixture using a spatula. Add the chopped Oreos and fold again just until evenly combined. The filling should look speckled with cookie pieces and hold soft peaks.
Step 3: Fill and Chill
Spoon the mixture into the chilled crust and spread it evenly with a spatula. Cover the pie loosely with plastic wrap and refrigerate it for at least six hours or overnight. The longer it chills, the firmer and smoother it becomes.
Step 4: Garnish and Serve
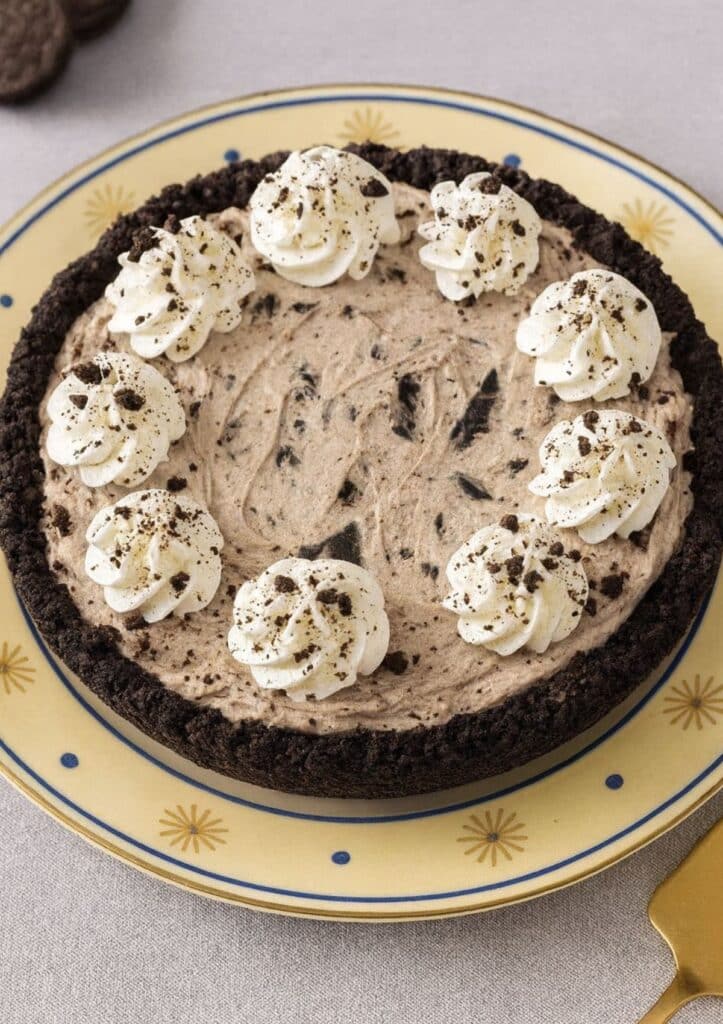
Before serving, top your Oreo Pie with fresh whipped cream and a few extra cookie crumbles for garnish. For an elegant look, drizzle a little chocolate sauce or sprinkle chocolate curls on top. Slice with a warm knife to create clean, even servings.
Here’s a quick reference table for timing and tools:
| Step | Time | Tool |
|---|---|---|
| Crust Preparation | 10 minutes | Food processor or rolling pin |
| Filling | 10 minutes | Hand or stand mixer |
| Chill | 6 hours minimum | Refrigerator |
Once chilled, this Oreo Pie becomes smooth, rich, and perfectly sliceable—ideal for serving at parties or keeping as a make-ahead treat in your fridge.
Make-Ahead and Storing
Oreo Pie makes entertaining easy because you can prepare it days ahead without losing texture or flavor. I often make this pie the night before a family gathering or holiday dinner, and it tastes even better the next day. The extra chill time deepens the flavor, allowing the cream cheese and whipped cream to blend perfectly with the crushed Oreos.
To make it ahead, prepare the crust and filling as directed, then cover the pie tightly with plastic wrap or foil. Store it in the refrigerator for up to two days before serving. The crust will stay crisp, and the filling will remain creamy and rich. For longer storage, freeze the pie for up to two months. Wrap it securely in both plastic wrap and aluminum foil to prevent freezer burn. Before serving, thaw it in the refrigerator overnight. The texture will stay smooth, and the flavor remains fresh.
If you plan to top your pie with whipped cream, add it just before serving. This keeps the topping fluffy instead of slightly weeping from condensation. For a bakery-style presentation, pipe whipped cream around the edges and sprinkle cookie crumbs or chocolate curls in the center.
Storing Leftover Oreo Pie
Keep leftover Oreo Pie covered and refrigerated to maintain its creamy consistency. The pie keeps well for three to four days in the fridge when tightly wrapped. Each slice stays soft yet firm, and the crust holds together beautifully.
Avoid leaving the pie out at room temperature for more than 30 minutes, especially in warm weather, as the whipped cream can soften quickly. If you’ve topped the pie with extra Oreos or chocolate drizzle, store it in a covered container to prevent the toppings from going soggy.
Here’s a simple table to help manage storage times:
| Storage Method | Duration | Tips |
|---|---|---|
| Refrigerator | Up to 4 days | Cover tightly to prevent drying |
| Freezer | Up to 2 months | Wrap in plastic and foil; thaw in fridge |
Freezing leftover slices also works great for individual servings. I wrap each slice separately in parchment paper before freezing, so Daniel and the girls can grab one whenever they crave a treat.
Frequently Asked Questions
Frequently Asked Questions
Did Oreo pie crust get discontinued?
Oreo Pie crusts from Nabisco were temporarily unavailable in some stores, but they haven’t been permanently discontinued. Many grocery stores restocked them, though supplies can vary by region. If you can’t find one, make your own at home using crushed Oreos and melted butter—it takes only five minutes and tastes fresher than the packaged version. Plus, homemade crusts let you control thickness and flavor.
What is the rarest Oreo cookie ever?
When making Oreo Pie, you might notice that some specialty Oreo flavors are harder to find. The rarest Oreo ever released was the “Supreme Oreo”, a limited-edition collaboration with the fashion brand Supreme. Only a few packages hit the market, and they sold out instantly. Other rare flavors include Swedish Fish Oreos and Cherry Cola Oreos—fun to try if you ever come across them, but for this pie, the classic flavor always works best.
Can you make Oreo pie with different Oreos?
Absolutely! Oreo Pie works beautifully with almost any flavor. Golden, Mint, Peanut Butter, and even Carrot Cake Oreos add a creative twist while keeping that creamy consistency. The trick is maintaining the same cookie-to-butter ratio for the crust. You can even mix flavors for a marbled effect or use seasonal Oreos to match holidays—like red and green for Christmas or pastel for Easter.
What makes Oreo cream pie so popular?
Oreo Pie remains one of the most beloved no-bake desserts because it hits every craving at once: creamy, crunchy, chocolatey, and cold. It’s also simple to make, kid-approved, and endlessly customizable. The contrast between the light filling and crunchy crust feels indulgent but never heavy. Add in the nostalgia of Oreos and you’ve got a dessert that connects generations—from kids crushing cookies on the counter to grandparents sharing a slice after Sunday dinner.
Oreo Pie – Easy No-Bake Dessert Everyone Loves

Easy no-bake Oreo Pie with creamy whipped filling and crunchy Oreo crust.
- Prep Time: 15 minutes
- Cook Time: 0 minutes
- Total Time: 6 hours 15 minutes
- Yield: 1 (9-inch) pie 1x
- Category: Dessert
- Method: No-Bake
- Cuisine: American
- Diet: Vegetarian
Ingredients
24 Oreos (275g)
¼ cup unsalted butter, melted (56g)
1 cup heavy whipping cream (240mL)
1 (8-ounce/226g) block cream cheese, room temperature
¾ cup confectioners’ sugar (90g)
1½ teaspoons vanilla extract
20 Oreos, chopped, plus more for garnish
Whipped cream for serving
Instructions
1. Lightly spray a 9-inch pie pan with cooking spray.
2. Crush Oreos in a food processor until finely ground. Mix with melted butter.
3. Press mixture into the bottom and sides of the pie pan; freeze for 30 minutes.
4. Whip the cream on medium-high speed until stiff peaks form.
5. In another bowl, beat cream cheese until fluffy. Add sugar and vanilla.
6. Fold whipped cream and chopped Oreos into the mixture until combined.
7. Spoon filling into crust, spread evenly, and refrigerate 6 hours.
8. Top with whipped cream and crushed Oreos before serving.
Notes
Freeze for 30 minutes before filling for a crisp crust.
Chill overnight for best texture.
Top with chocolate curls, mini chips, or drizzle for extra flavor.
Nutrition
- Serving Size: 1 slice
- Calories: 590
- Sugar: 39g
- Sodium: 343mg
- Fat: 38g
- Saturated Fat: 20g
- Unsaturated Fat: 16g
- Trans Fat: 0.3g
- Carbohydrates: 59g
- Fiber: 2g
- Protein: 6g
- Cholesterol: 78mg
Keywords: Oreo Pie, no bake pie, cookies and cream dessert