
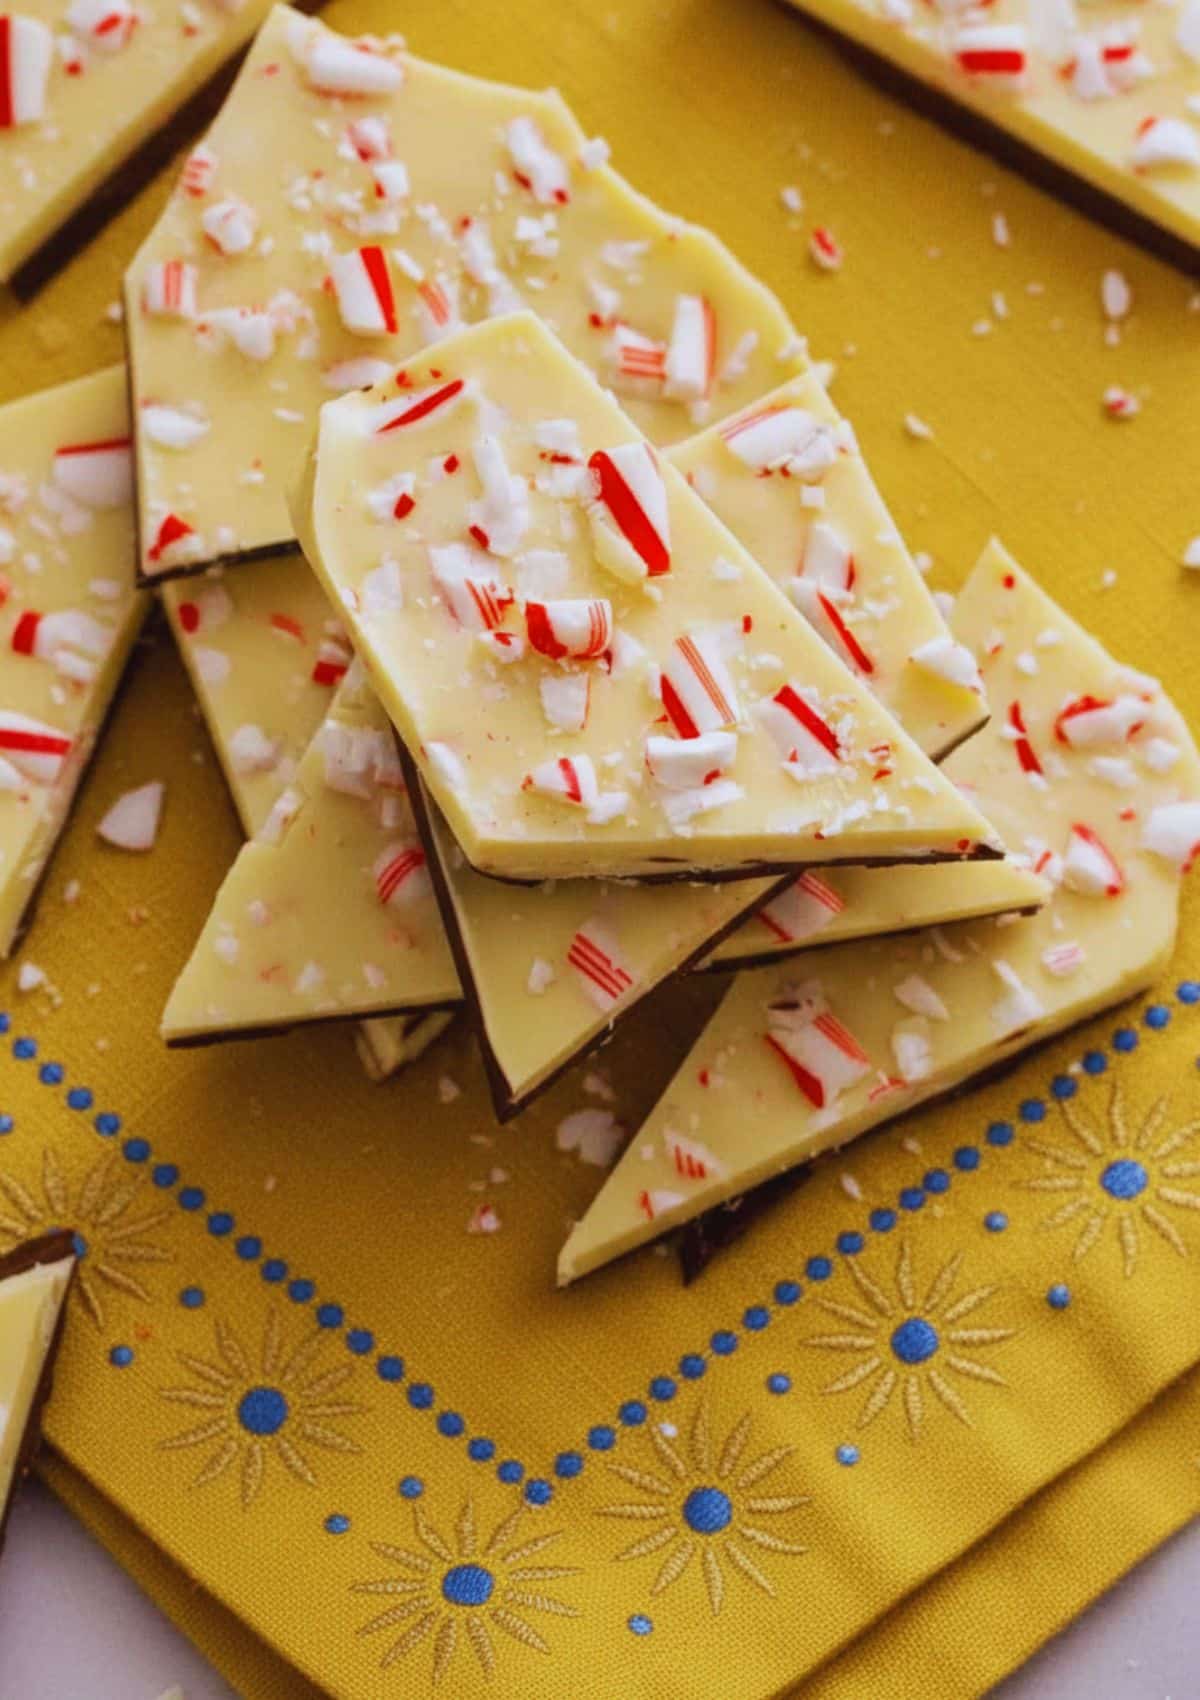
Peppermint Bark is one of those timeless holiday treats that feels like Christmas wrapped in chocolate. Every December, my kitchen in Los Angeles transforms into a peppermint-scented workshop. My daughters, Hannah and Jessica, love to crush candy canes with rolling pins, and Daniel, my husband, can’t resist sneaking a bite while the bark cools on the counter. It’s become a cozy family tradition—equal parts sweet chaos and chocolate bliss.
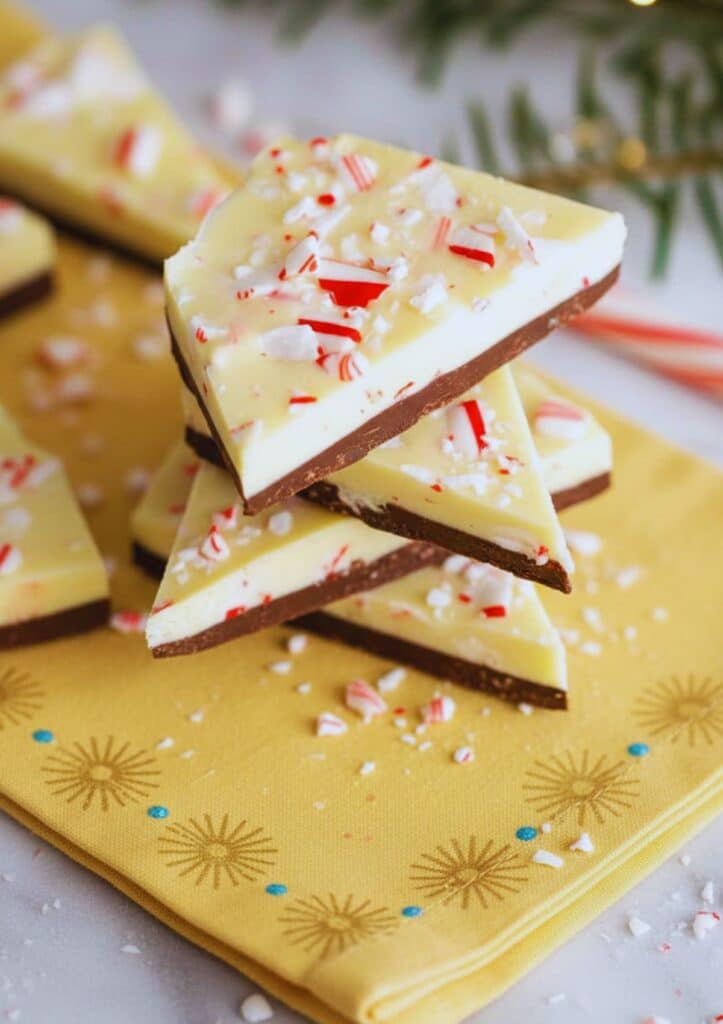
I still remember the first batch I made years ago. I’d been searching for a homemade gift that didn’t require special tools or hours of decorating. The first swirl of melted chocolate and peppermint magic convinced me: this was it. What I love about this peppermint bark recipe is how beautifully simple it is. You only need four ingredients—dark chocolate, white chocolate, peppermint extract, and crushed candy canes. That’s it! No candy thermometer, no baking, and no stress. Just a few minutes of melting, spreading, and chilling, and you have a festive dessert that’s as pretty as it is delicious.
The beauty of peppermint bark lies in its contrast—dark chocolate’s deep cocoa flavor against the creamy sweetness of white chocolate, with a crunchy peppermint finish that makes every bite pop. And it’s not just for snacking. Over the years, I’ve used this bark to decorate holiday cakes, stir into hot chocolate, or wrap in little bags for teachers and neighbors. It’s the kind of recipe that never fails to impress yet always feels homemade and heartfelt.
If you’re new to candy-making, don’t worry—this recipe is forgiving. Even if your layers aren’t perfect or your candy canes are a bit uneven, the final result will still look stunning. It’s the imperfections that make each piece of peppermint bark unique, like a chocolate snowflake. Plus, it stores beautifully, so you can make it ahead for parties or gifts.
This guide will walk you through everything: from picking the right chocolate to preventing layers from separating, adjusting thickness, and even fun variations like mocha bark or cookies-and-cream swirl. Whether you’re making this for a party tray or packaging it as gifts, you’ll learn how to master the texture, flavor, and presentation like a pro.
Table of Contents
Key Ingredients & Substitutions
The Chocolate Matters Most
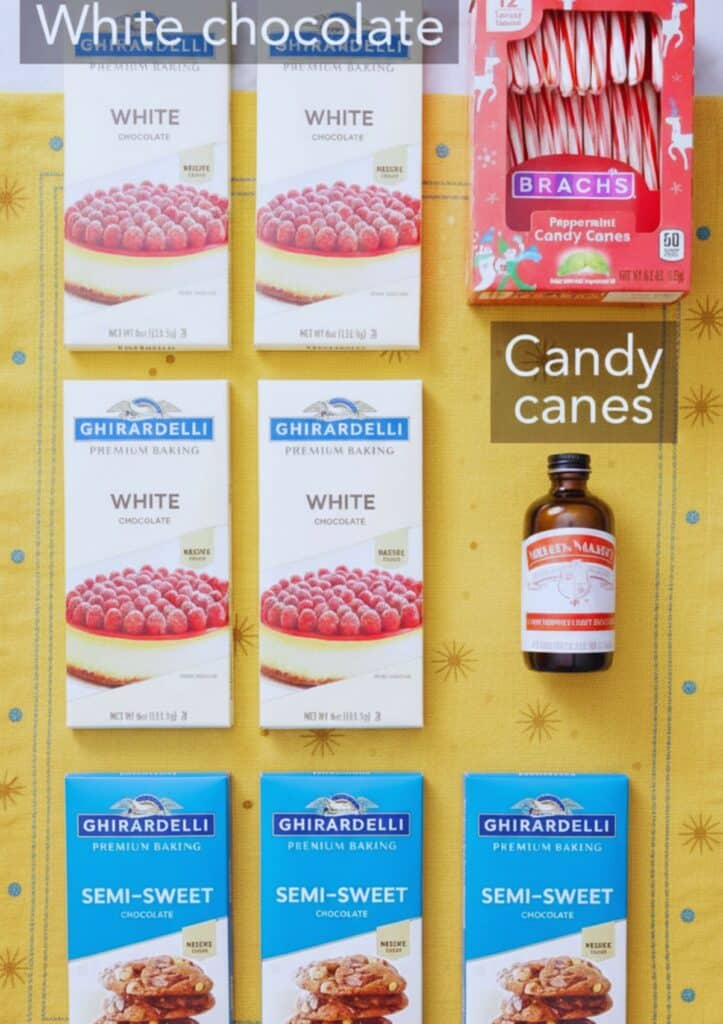
The secret to exceptional peppermint bark is quality chocolate. It’s tempting to grab any bag of chips, but not all chocolate melts evenly or sets properly. For the base layer, choose semisweet chocolate bars (around 12 ounces or 375g). Chop them finely before melting—smaller pieces melt faster and more evenly.
I usually use bar chocolate rather than chips because bars contain more cocoa butter, giving a smoother texture and clean snap once set. Chips are designed to hold their shape, so they can result in thicker, grainier bark unless you temper them or add a little neutral oil to loosen the consistency.
For the white layer, go for real white chocolate bars—not candy coating or “white baking chips.” Real white chocolate contains cocoa butter, which delivers that rich, creamy finish. Candy melts will work in a pinch, but they don’t have the same luscious flavor or silky texture. If you’re shopping by brand, Ghirardelli and Lindt are two solid, widely available choices.
Tip: If you’re sensitive to sweetness, you can use bittersweet chocolate for the bottom layer. It balances beautifully with the candy canes and keeps the overall bark from becoming overly sugary.
Peppermint Extract vs. Candy Canes
The magic of peppermint bark comes from its dual flavor sources—peppermint extract and crushed candy canes. The extract infuses the chocolate with a smooth, cool note, while the candy pieces add crunch and festive flair.
If you can’t find peppermint extract, pure mint extract works too, but go easy—it’s stronger and can taste herbal rather than sweet. Avoid artificial peppermint flavorings, which often leave a bitter aftertaste.
As for the candy canes, any brand works fine. Crush them into small pieces (not dust) so they add both flavor and texture. I like to sprinkle a third into the white chocolate and the rest on top so you get that classic red-and-white sparkle.
Easy Ingredient Swaps
Want to make your peppermint bark a little different? Here are some of my favorite tried-and-true variations:
| Ingredient | Possible Substitution |
|---|---|
| Semisweet Chocolate | Bittersweet chocolate or milk chocolate (for a creamier, sweeter base) |
| White Chocolate | Vegan white chocolate or candy coating |
| Peppermint Extract | Mint extract or crushed peppermint candies |
| Candy Canes | Crushed peppermint candies or red sprinkles for color only |
This flexibility means you can tailor the bark to your preferences or dietary needs. I’ve even made a dairy-free peppermint bark using high-quality vegan chocolate and plant-based white chocolate—it sets beautifully and tastes just as festive.
A Few Expert Tips on Melting Chocolate
When melting chocolate, patience is key. I prefer the double boiler method because it gives you control and prevents scorching. If you’re using the microwave, heat in short bursts at 50% power and stir between intervals. The goal is silky, not scorched.
Never let water get into your chocolate—it will seize instantly. If that happens, don’t panic! Add a teaspoon of coconut oil or shortening and stir vigorously to bring it back together.
Once the chocolate is melted, work quickly but carefully. Spread the dark layer first, let it cool slightly, and then pour on the white layer while it’s still soft but not warm enough to melt through. This helps prevent the dreaded separation between layers later on (we’ll dive into that soon).
Flavor Enhancements
You can add a pinch of sea salt to the semisweet layer to bring out the cocoa notes, or even stir in espresso powder for a mocha-inspired twist. Some bakers like to swirl the two chocolates together for a marbled effect, but if you love that distinct two-layer look, keep the layers separate and crisp.
For a creative twist, swap out peppermint extract for orange or almond extract—both pair beautifully with chocolate and create a whole new kind of bark.
Can I Use Chocolate Chips?
The short answer? Yes — but with a few tricks. Many bakers grab chocolate chips when making peppermint bark, thinking they’ll melt as easily as bars. Unfortunately, that’s where problems start. Chips are designed to hold their shape during baking, not melt into smooth, glossy chocolate. Manufacturers add stabilizers to help them keep structure inside cookies, which means they resist melting evenly.
If you toss a bowl of chocolate chips straight into the microwave, you’ll notice they soften but don’t turn into that velvety pourable texture. This makes it hard to spread an even layer for bark, and it can cause streaks, lumps, or grainy patches once set.
That said, if chocolate bars aren’t available, you can absolutely make peppermint bark with chips—you just need a little adjustment. Start by adding a teaspoon of neutral oil (like refined coconut or vegetable oil) to every 8 ounces of chips. This extra fat mimics the cocoa butter found in bar chocolate, helping the chips melt into a smoother, more fluid consistency.
When melting, use the double boiler method instead of microwaving. Stir constantly, keeping the heat gentle so the chocolate doesn’t scorch. Once it’s glossy and fluid, it’s ready to pour. If you’re using both semisweet and white chips, melt them separately—white chocolate chips are even more heat-sensitive and can seize quickly.
If your bark looks dull after setting, don’t panic. Chips lack the cocoa butter that gives that signature “snap,” but flavor-wise, it’ll still taste divine. To restore some shine, you can drizzle a tiny bit of tempered chocolate or dust the surface with crushed candy canes right before it hardens.
For best results, pour your melted chocolate quickly onto parchment and spread it evenly. Let the semisweet layer cool slightly—about 20 minutes in the fridge—before adding the white chocolate layer with peppermint extract. This short rest keeps the layers distinct but still bonded.
Tip: If you’re making a large batch for gifts, use a silicone baking mat instead of parchment. It releases the chocolate cleanly and gives the bark a smooth, professional finish.
For Thinner Bark, Use a Larger Pan
Thickness makes a surprising difference in peppermint bark. A thick slab offers a satisfying crunch, but too thick and it becomes hard to break cleanly—or worse, separates between layers. Using a larger pan is the easiest way to control your bark’s final thickness.
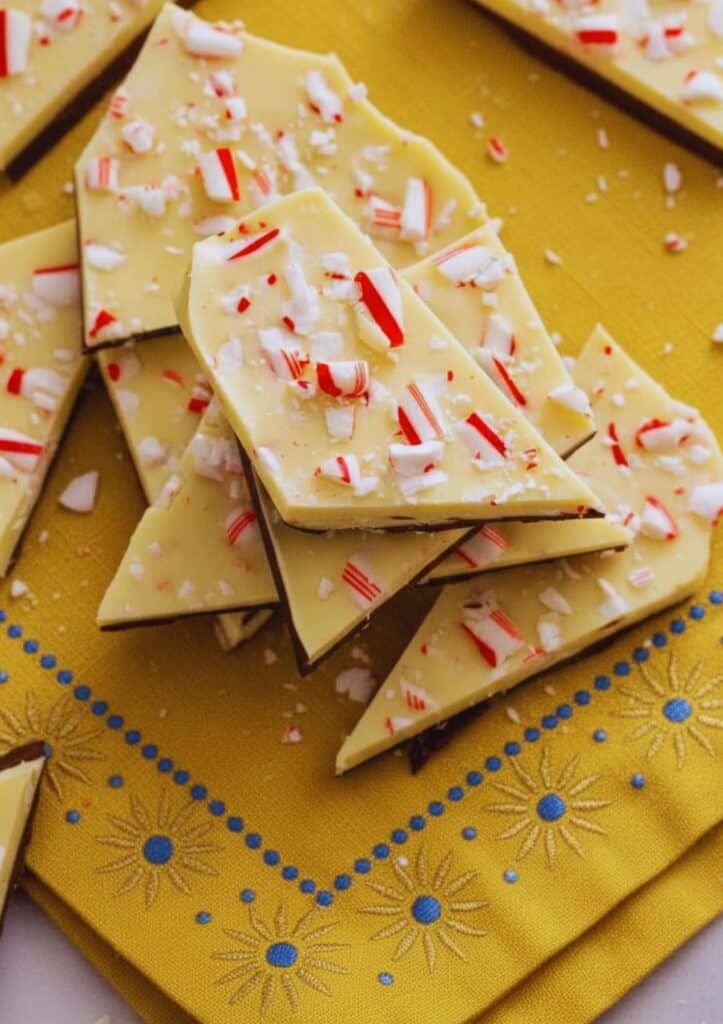
If you’re using an 8×8-inch pan, your bark will be thicker—great for rustic squares or gift boxes. But if you prefer elegant, easy-to-bite pieces, switch to a 9×13-inch pan or a standard baking sheet lined with parchment paper. The thinner spread gives you more delicate shards and helps the chocolate set faster and more evenly.
When using a larger pan, remember: spread the chocolate evenly to avoid thin spots that might crack. A small offset spatula or rubber scraper works best. The goal is an even surface—smooth but not paper-thin. After adding the top white chocolate layer, gently tap the pan against the counter to remove air bubbles and ensure both layers make full contact.
If you’re improvising with foil, you can make a custom pan by folding the edges upward to form a wall, keeping the chocolate contained at your desired thickness. It’s a clever trick I learned one year when my square pan disappeared somewhere between cookie batches and hot cocoa nights.
A thinner bark has another advantage—it’s easier to gift. Once fully set, it breaks into perfectly sized shards that tuck neatly into bags or tins. A quick wrap in wax paper with a ribbon instantly transforms it into a homemade holiday present that looks store-bought.
Tip for a Cleaner Cut:
If you prefer clean, even squares instead of rustic shards, remove the chilled bark from the pan and let it sit at room temperature for 20–30 minutes before cutting. Use a sharp chef’s knife warmed under hot water and dried—each slice will glide through without cracking the layers.
Quick Visual Comparison
| Pan Size | Approximate Bark Thickness | Best For |
|---|---|---|
| 8×8-inch Pan | Thick (3/8 inch) | Gift boxes, chunky pieces |
| 9×13-inch Pan | Medium (1/4 inch) | Balanced texture, even layering |
| Baking Sheet | Thin (1/8 inch) | Elegant shards, fast setting |
The size of your pan can also affect the cooling time. Thinner bark sets faster—usually within 45 minutes—while thicker layers can take an hour or more to fully harden. Resist the temptation to rush the chilling process by freezing; extreme temperature changes can cause the layers to separate once they’re back at room temperature.
For the perfect glossy finish, let the bark cool naturally at room temperature for 15 minutes before refrigerating. This gradual cooling helps the cocoa butter stabilize and gives your peppermint bark that crisp, shiny surface you see in professional candy shops.
Once you’ve nailed your chocolate base and chosen your ideal thickness, you’re ready to tackle one of the most common candy-making challenges—keeping the layers from separating. That’s where temperature, timing, and a few clever tricks come in.
Why Did My Layers Separate?
If you’ve ever lifted a piece of peppermint bark only to have the white chocolate slide right off the dark chocolate, you’re not alone. It’s one of the most common frustrations in homemade bark—and it usually comes down to temperature, timing, or texture. But the good news? It’s easy to fix once you know the why.
The biggest reason layers separate is that the bottom layer cools too much before the top layer goes on. When dark chocolate becomes firm and cold, the white layer can’t properly adhere—it just sits on top like a slick tile. When you break the bark later, the two layers naturally split apart.
To prevent this, pour the white chocolate layer when the dark chocolate is just set but still slightly tacky. It should feel firm to the touch but not cold. This allows the two chocolates to fuse together as they finish setting in the fridge. If you over-chill the first layer, simply let it rest at room temperature for a few minutes before adding the next.
Another culprit is moisture or condensation. If you move the bark in and out of the refrigerator too quickly, moisture forms between the layers. Always allow a short rest period at room temperature before transferring the pan to the fridge. This helps the chocolate adjust gradually and keeps the surface dry.
The type of chocolate also matters. Low-quality chips or candy melts can have uneven fat content, making them more prone to separation. Real bar chocolate—with cocoa butter—is much more stable and bonds beautifully when layered.
If your layers do separate after setting, don’t throw the bark away! You can gently remelt both layers together in a heatproof bowl, stir until smooth, and repour. Or, break it into smaller pieces and serve it “rustic style.” I’ve done this countless times, and no one has ever complained.
Here’s a quick table you can use for troubleshooting:
| Problem | Possible Cause | Solution |
|---|---|---|
| Layers separating | Base layer too cold before adding top | Add top layer when base is tacky, not firm |
| Soft or sticky surface | Condensation during chilling | Allow gradual cooling at room temperature |
| White layer crumbles when broken | Overheated white chocolate | Melt gently at 50% power or over simmering water |
Another pro trick: once your peppermint bark is set and removed from the fridge, let it rest at room temperature for 10–15 minutes before cutting or breaking. This helps the chocolate settle and reduces stress cracks between layers. The result? Clean, glossy bark with that perfect holiday “snap.”
And if you ever need to fix an over-hardened base before layering, use a hairdryer or heat gun to gently warm the surface for 5–10 seconds. It slightly softens the chocolate, creating a better bond without remelting it entirely. I discovered this by accident one year while photographing bark for my blog—it’s a lifesaver.
Peppermint Bark Variations
The classic peppermint bark combination of dark and white chocolate with candy canes is a holiday favorite—but once you master the base, you can create endless variations that fit any season or craving. Here are some of my family’s favorites:
Mocha Peppermint Bark
Add 1 teaspoon of instant espresso powder to the melted semisweet chocolate layer before spreading it. The coffee enhances the cocoa flavor and adds a sophisticated depth that balances the sweetness of the white chocolate. Sprinkle a touch of cocoa powder on top before it sets for a café-style finish.
Cookies and Cream Peppermint Bark
Fold ½ cup of crushed chocolate sandwich cookies into the white chocolate layer instead of candy canes. Top with additional cookie crumbles for a nostalgic, kid-friendly version that disappears fast.
Peppermint Pretzel Crunch
Mix ¼ cup of crushed salted pretzels into the dark chocolate before layering. The salty crunch cuts through the sweetness and adds texture that’s absolutely addictive.
Matcha Swirl Bark
Stir ½ teaspoon of matcha powder into half of the melted white chocolate, then swirl it with the plain half before pouring over the dark chocolate layer. The green marbling makes this version stunning for winter parties or spring celebrations.
Vegan or Dairy-Free Peppermint Bark
Use high-quality dairy-free chocolate bars (many dark chocolates already are) and a plant-based white chocolate alternative. Check that both are made with cocoa butter instead of palm oil for a creamy texture. Add crushed vegan candy canes—yes, they exist!—and follow the same method.
Spiced Holiday Bark
For a cozy twist, add a pinch of cinnamon or ginger to the white chocolate and top with crushed peppermint candies. The warming spices give a snickerdoodle-like flavor that’s surprisingly addictive and pairs beautifully with hot cocoa.
When experimenting with variations, remember that balance is key. Too many mix-ins can make the bark crumble or prevent it from setting cleanly. Stick to a total of ½ to ¾ cup of add-ins for every pound of chocolate.
Each variation keeps the same spirit of peppermint bark—a treat that’s festive, crunchy, and chocolatey—but offers its own personality. My daughters love the cookies-and-cream version, while Daniel swears the mocha bark is “grown-up Christmas candy.”
Once you’ve played with flavors, presentation is the next step. You can drizzle melted dark chocolate over the finished bark for contrast, sprinkle edible glitter for shimmer, or break it into triangles and package it in cellophane for neighbors and teachers. Homemade bark makes one of the most elegant edible gifts because it looks as though you bought it from a gourmet shop—yet it takes less than an hour to make.
Pro Tips For Making The Best Peppermint Bark
After dozens of batches in my little Los Angeles kitchen, I’ve learned that the difference between good and great peppermint bark often comes down to the small details — the kind you only discover after a few candy-cane-filled Christmases.
Melt with Patience
Chocolate has a personality — rush it, and it will rebel. Always melt it slowly over simmering (not boiling) water or in the microwave at half power, stirring between intervals. Overheating causes streaks and clumping, which dulls your bark’s glossy finish. If the chocolate starts to look grainy, add a half teaspoon of coconut oil or shortening to smooth it out.
Temperature Timing is Everything
Let the semisweet layer cool until it’s set but not hard before adding the white chocolate. This ensures both layers bond without separating. If you wait too long, the layers will flake apart; if too soon, they’ll blend together. Aim for that “barely firm” sweet spot — about 15 to 20 minutes of chilling.
Crush Candy Canes, Don’t Pulverize
You want little jewel-like pieces of candy cane that add crunch, not dust that melts into sticky syrup. Place candy canes in a zip-top bag, wrap it with a towel, and use a rolling pin to crush gently. The mix of larger and smaller bits gives your peppermint bark that perfect texture.
Cool Gradually for a Glossy Finish
Avoid placing hot chocolate directly into the fridge. Let it rest at room temperature for 10–15 minutes first. This gradual cooling prevents condensation, which can dull the chocolate’s sheen.
Use Quality Chocolate
Skip the candy melts. Real bar chocolate, made with cocoa butter, melts smoother and sets with a clean snap. If you’re making bark to gift or photograph, this one upgrade makes all the difference.
Make It Ahead
Peppermint bark stores beautifully. Keep it in an airtight container for up to a week at room temperature or three weeks in the refrigerator. Just avoid freezing — candy canes absorb moisture when thawed, becoming gooey.
For Gift-Giving
Break or cut the bark into neat shards, then wrap a few pieces in wax paper or parchment and tie with string. Add a gift tag or holiday label — it looks artisanal, festive, and heartfelt.
How To Make Peppermint Bark
Here’s the full step-by-step method for making perfect peppermint bark at home — smooth, shiny, and gorgeously festive.
Step 1: Line Your Pan
Line an 8×8-inch baking dish with parchment or wax paper. For thinner bark, use a 9×13-inch pan or a rimmed baking sheet. This keeps the chocolate from sticking and makes cleanup a breeze.
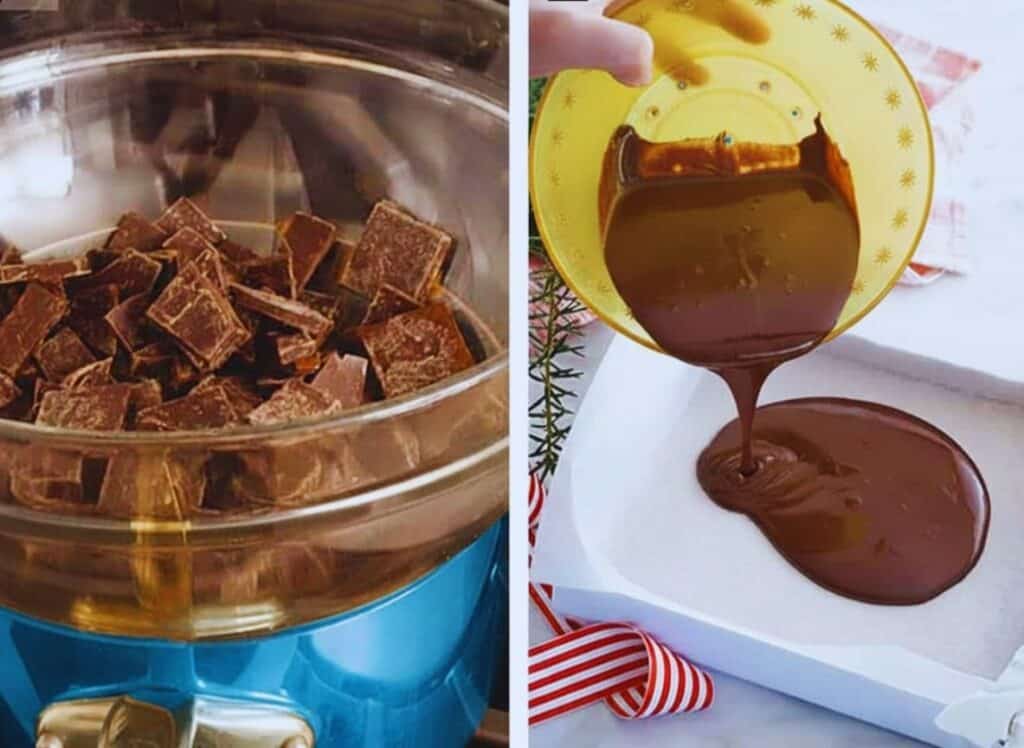
Step 2: Melt the Semisweet Chocolate
Place chopped semisweet chocolate (12 ounces) in a heatproof bowl. Melt gently over simmering water or microwave at 50% power in 30-second bursts, stirring each time. Once smooth, pour into the pan and spread evenly with a spatula. Chill for about 20 minutes until just set.
Step 3: Melt the White Chocolate
In another bowl, melt 16 ounces of chopped white chocolate the same way. Once melted, stir in ½ teaspoon of peppermint extract and about ⅓ cup of crushed candy cane pieces.
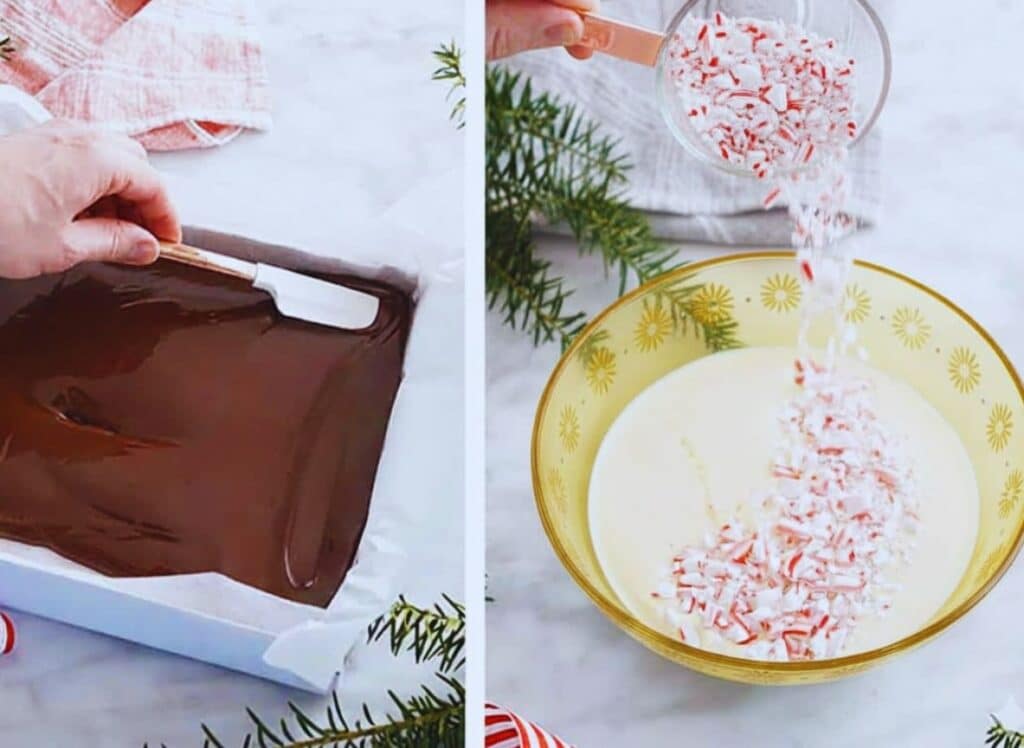
Step 4: Combine and Chill
Pour the white chocolate mixture on top of the set dark layer. Smooth gently with a spatula to create an even surface. Sprinkle remaining crushed candy canes over the top. Tap the pan gently to settle everything evenly. Refrigerate for about 1 hour or until completely set.
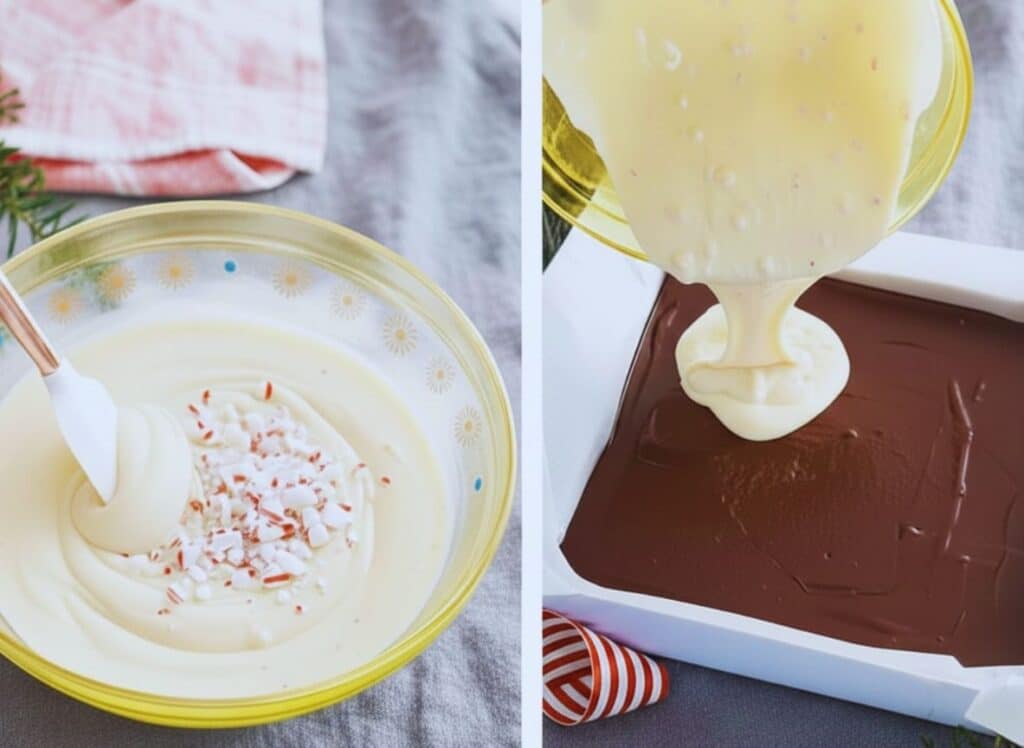
Step 5: Cut and Serve
Once set, lift the bark from the pan using the parchment edges. Let it rest at room temperature for 30 minutes, then break into shards or cut into squares using a warm knife.
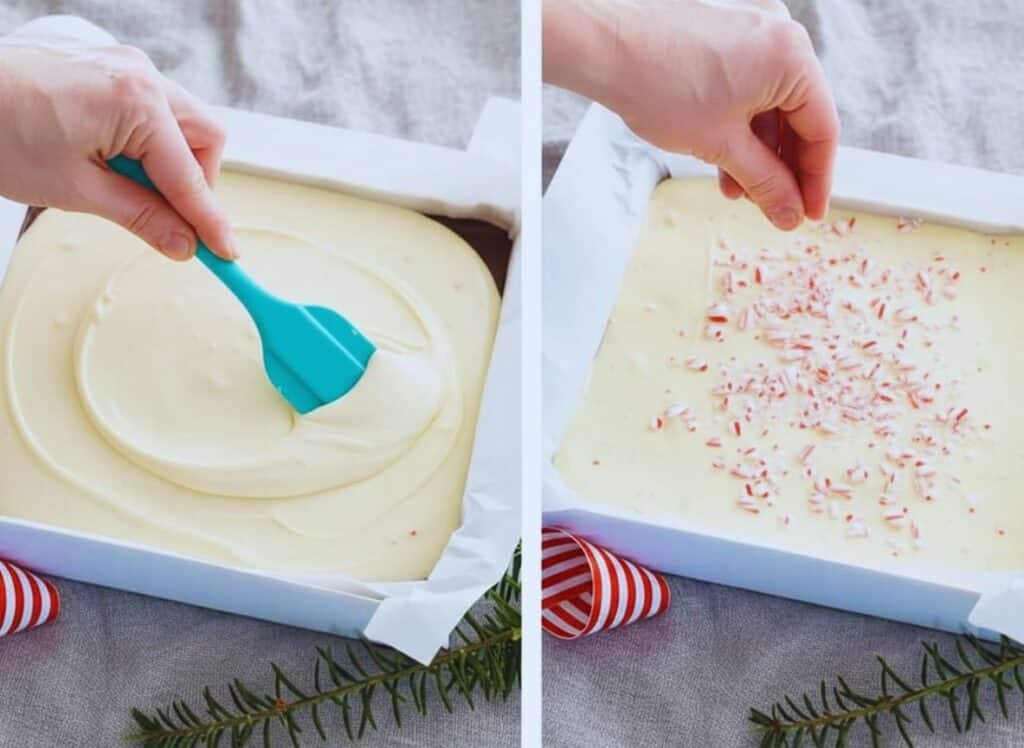
Pro Tip:
For a marbled look, drizzle a little dark chocolate over the white layer before sprinkling candy canes. Use a toothpick to create gentle swirls — it looks beautiful and adds extra chocolate flavor.
When done correctly, this peppermint bark will have crisp edges, a glossy finish, and layers that hold together perfectly. Every bite should deliver creamy chocolate, cool peppermint, and crunchy candy — the ultimate holiday combination.
How To Use Peppermint Bark
Homemade peppermint bark is more versatile than you might think! Once you’ve made a batch, try these creative ways to enjoy it beyond the classic snacking platter.
1. Peppermint Mocha Upgrade:
Stir a small square into a steaming mug of hot chocolate or coffee. It melts perfectly and adds instant holiday flavor.
2. Cake & Cupcake Topping:
Crush leftover bark and sprinkle over frosted cupcakes, cheesecakes, or even brownies. The red and white shards look festive on anything chocolate.
3. Ice Cream Sundae Magic:
Mix small pieces into vanilla or chocolate ice cream for a homemade “peppermint chip” experience.
4. Giftable Holiday Favors:
Wrap pieces in clear bags or mason jars tied with ribbon for teachers, coworkers, or neighbors. Add a handwritten tag for a personal touch.
5. Dessert Board Accent:
Pair bark shards with cookies, chocolate truffles, and spiced nuts for an elevated holiday dessert board.
Frequently Asked Questions
What is peppermint bark made of?
Peppermint bark is made with semisweet and white chocolate layers, flavored with peppermint extract and topped with crushed candy canes. It’s a no-bake holiday candy that’s festive and easy to prepare.
Why is Williams Sonoma peppermint bark so good?
Williams Sonoma uses premium chocolate and real peppermint oil for intense flavor and smooth texture. This homemade version achieves a similar taste using quality ingredients and careful melting techniques.
Why do they call it peppermint bark?
The term “bark” refers to how the chocolate hardens into a flat slab that can be broken into rough, tree-bark-like pieces. It’s a candy-making term used for layered chocolate confections.
What are the benefits of peppermint bark?
It’s a simple, budget-friendly treat that looks impressive, keeps well, and makes an excellent edible gift. The peppermint also offers a refreshing contrast to the sweetness of the chocolate, balancing each bite perfectly.
Peppermint Bark

This homemade Peppermint Bark recipe is an easy, festive treat made with only four ingredients—dark chocolate, white chocolate, peppermint extract, and crushed candy canes. Perfect for gifting or holiday snacking.
- Prep Time: 10 minutes
- Cook Time: 15 minutes
- Total Time: 1 hour 30 minutes
- Yield: 16 pieces 1x
- Category: Dessert
- Method: No-bake
- Cuisine: American
- Diet: Vegetarian
Ingredients
12 ounces semisweet chocolate bars, chopped (375g)
16 ounces white chocolate bars, chopped (450g)
½ teaspoon peppermint extract
7 candy canes, crushed
Instructions
1. Line an 8×8-inch baking dish with parchment paper or wax paper. For thinner bark, use a large baking sheet.
2. Place the semisweet chocolate in a medium heat-proof bowl. Melt it over simmering water or microwave in 30-second intervals at 50% power, stirring until smooth.
3. Pour the melted chocolate into the pan and spread into an even layer with a spatula. Chill until partially set, about 20 minutes.
4. Place the white chocolate in another bowl and melt it the same way. Stir in the peppermint extract and ⅓ cup of crushed candy cane.
5. Pour the white chocolate over the set dark layer. Smooth with a spatula and sprinkle the remaining crushed candy cane on top.
6. Refrigerate until completely set, about 1 hour. Let sit at room temperature for 30 minutes before cutting or breaking into pieces.
Notes
To make a custom-sized pan, use aluminum foil to create a smaller barrier within a large sheet pan.
Storage: Store peppermint bark in an airtight container for 1 week at room temperature or up to 3 weeks refrigerated. Avoid freezing, as candy canes become sticky when thawed.
Nutrition
- Serving Size: 1 piece
- Calories: 184
- Sugar: 16g
- Sodium: 18mg
- Fat: 11g
- Saturated Fat: 7g
- Unsaturated Fat: 3g
- Trans Fat: 0.01g
- Carbohydrates: 19g
- Fiber: 1g
- Protein: 2g
- Cholesterol: 5mg
Keywords: Peppermint Bark, chocolate bark, holiday desserts, Christmas candy